Recently in RecipeHouse Category

Cook the Harvest Classes

Recipe for Success
Vote 0 Votes

IMG_0940_Facetune_13-09-2021-17-27-05.jpeg
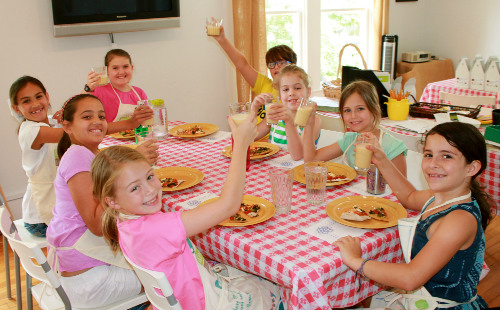
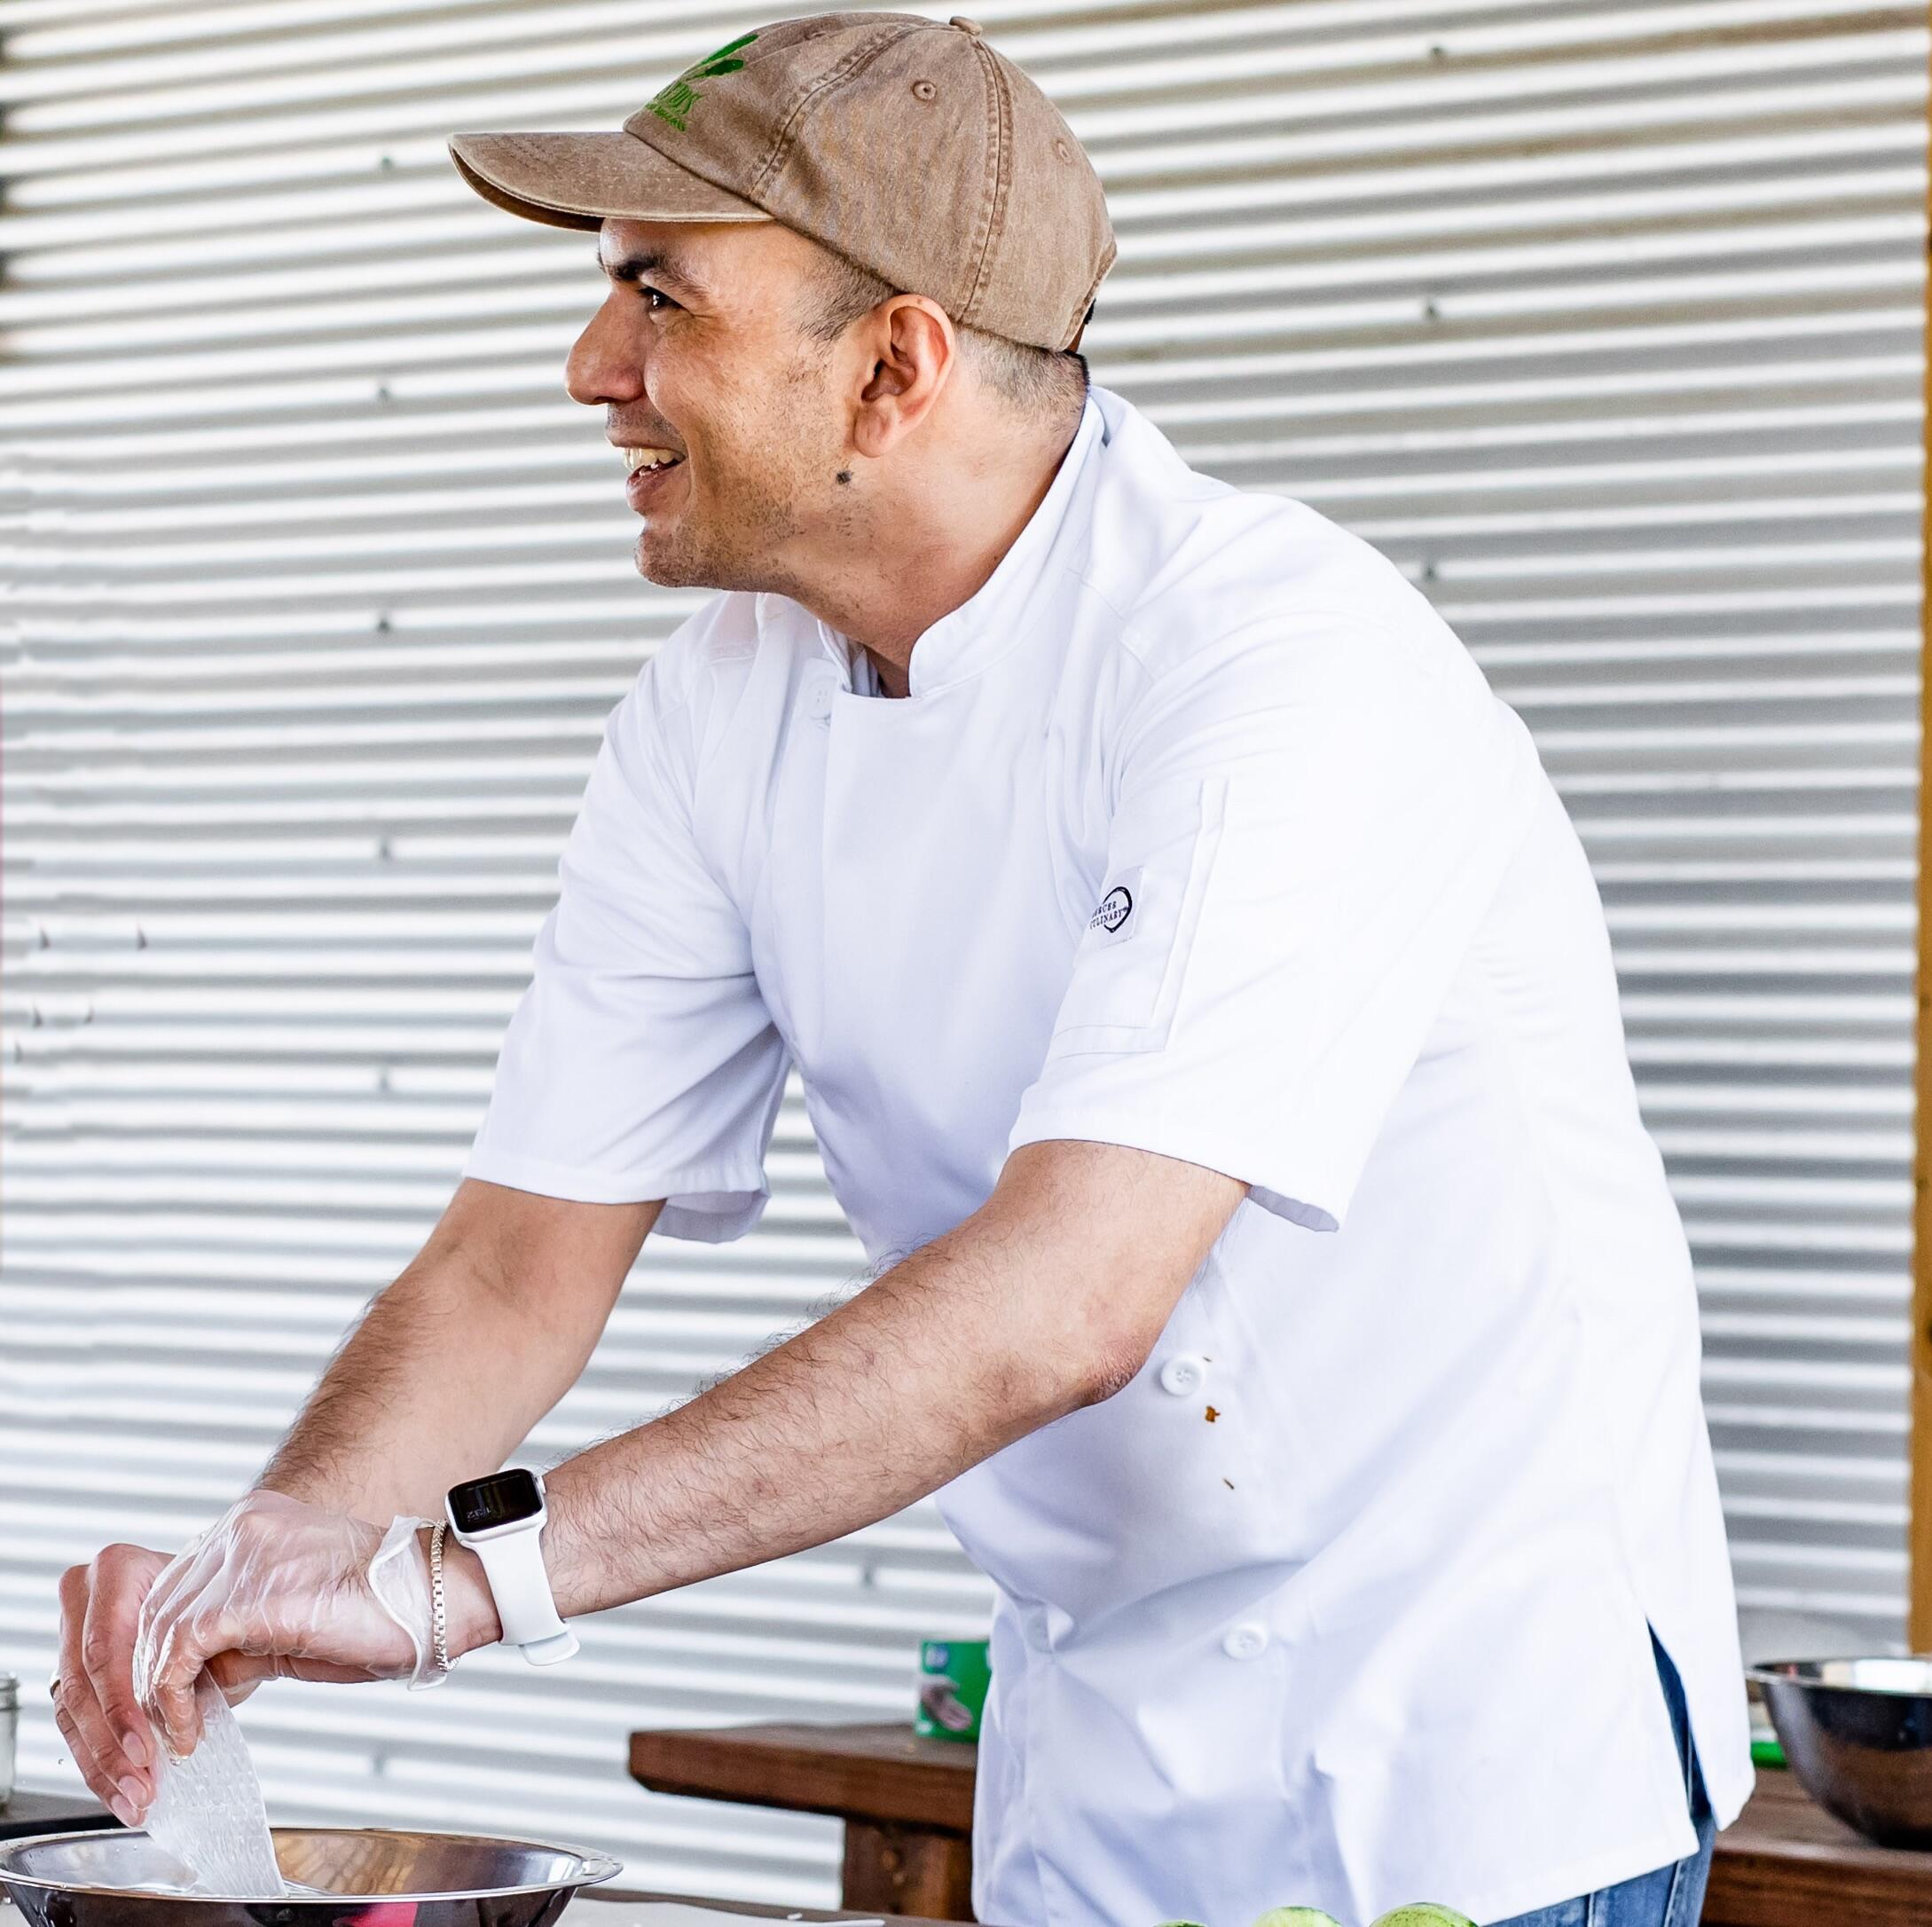
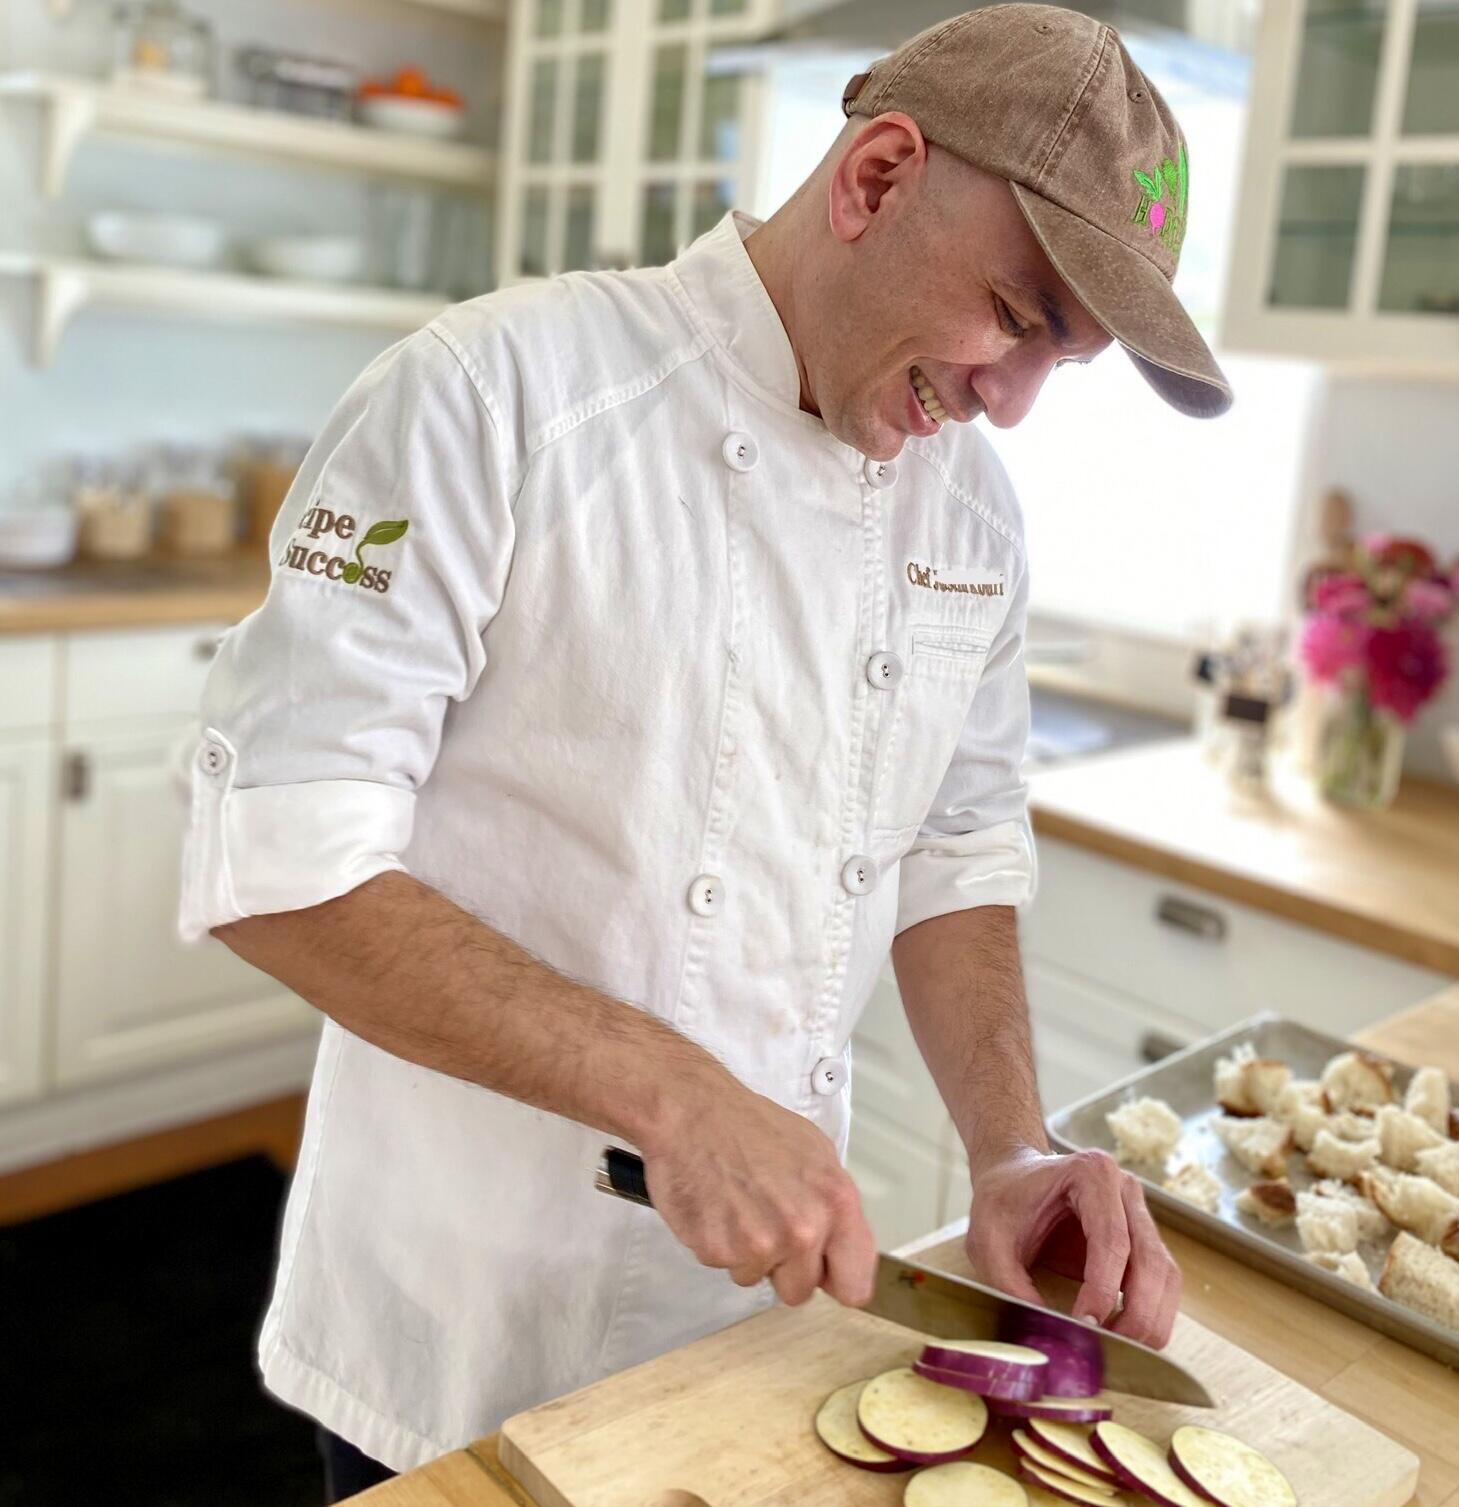
Great cooking is about more than recipes--it's about techniques. This fall we are offering three Cook the Harvest classes at Hope Farms to sharpen your skills. In our classes you'll work together in a fun, hands-on environment led by Chef Carlos. Classes will be held in the Gathering Barn, where it will be simple and safe to follow COVID health guidelines

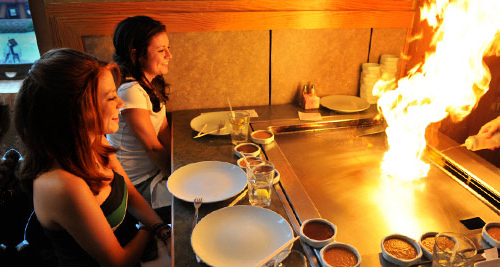
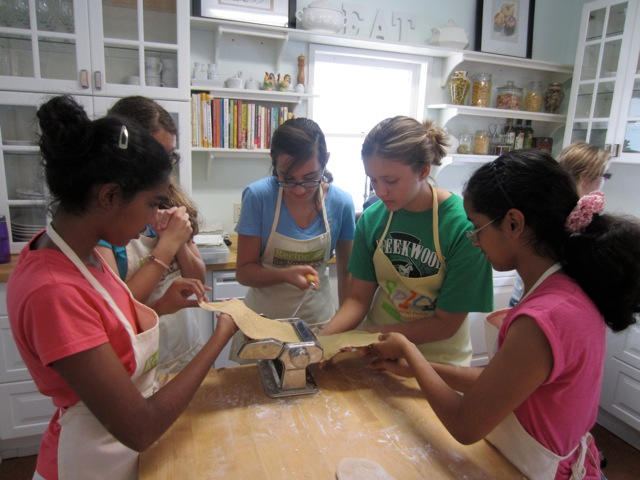
Saturday, October 16: Homemade Pasta Workshop
Pasta night is always the favorite family night of the week. Learn how to up your pasta dishes with fresh pasta dough. Simple, delicious and versatile, this staple is fun to make and lets you run wild with whatever else you have in the fridge. In this class, students will learn the fundamentals to rolling fresh pasta dough along with tips for cutting and storing noodles. Next, we cover the basics to making a seasonal pesto that makes the most of whatever is growing in the garden. Last, we will tackle how to prepare ravioli that are perfect for eating right away or storing in the freezer for a quick meal anytime.

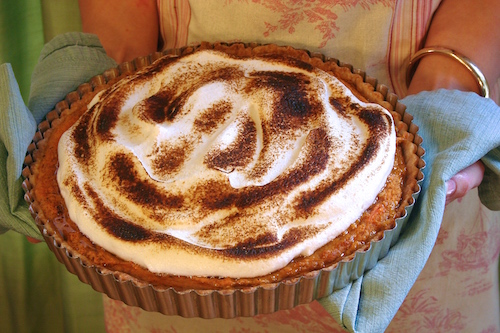
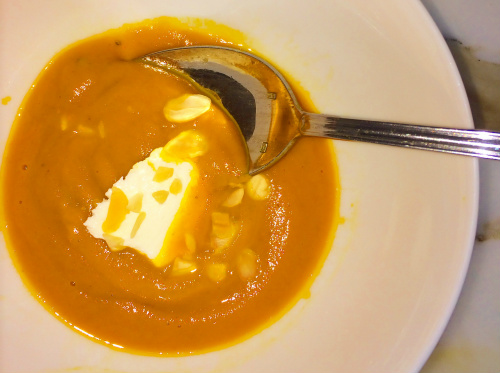
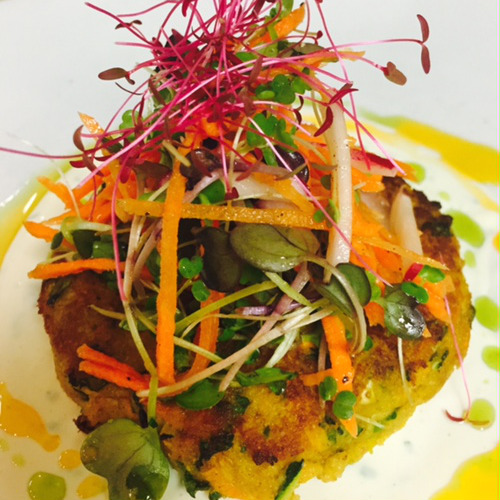
Saturday, November 13: Pastry Techniques for Entertaining
Get ready for fall entertaining with recipes that star everyones favorite- pastry! Learn the basics behind making pastry dough, rolling out an even crust and blind baking to serve up pies and quiches that will be the star of any meal. In addition, discover the pastry batter behind clafoutis, one of the easiest and most delicious ways to showcase any seasonal produce!

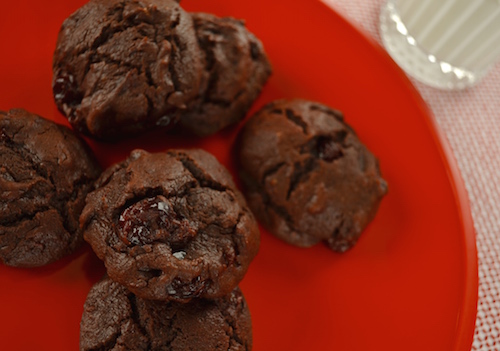
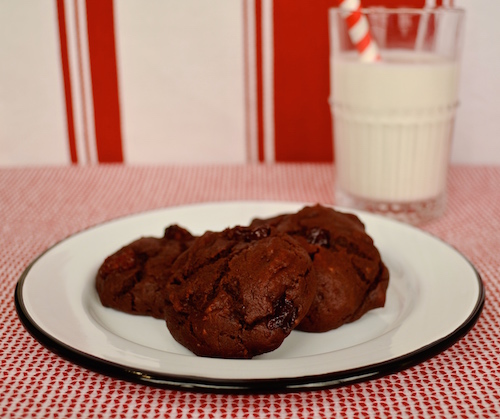
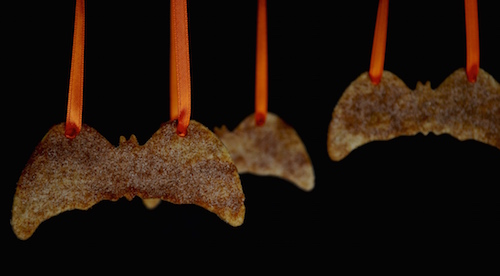
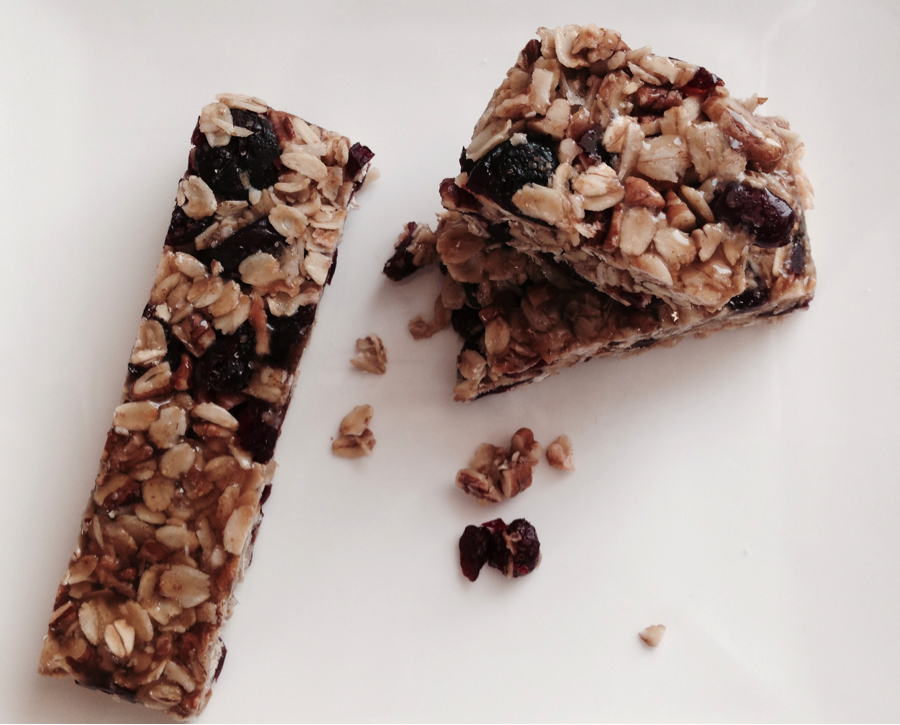
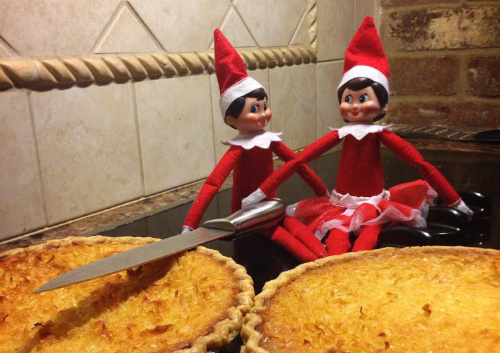
Saturday, December 11: Holiday Cookie Workshop
Get ready to impress and express your holiday cheer with two of everyone's seasonal favorites. Learn the basics of baking delicious sugar cookies and gingerbread men. Get all the tips you need to make a perfect classic royal icing. Develop your decorating skills by practicing the fundamentals of the flooding technique and explore how sanding sugars and more can make cookie decorating your new favorite tradition.

Snare your seat today!

RecipeHouse Goes Virtual

Recipe for Success
Vote 0 Votes

img_6206 3.jpgWe have welcomed Carlos Meltzer back into our fold as our Chef Instructor extraordinaire! Besides being our star teacher in the eatitfoodadventures.org culinary videos, Carlos will be hosting Zoom Cooking Classes at RecipeHouse. Carlos was one of our original Seed-To-Plate Instructors years ago when we were building out our award-winning program. He went on to host his own cooking show, and run the Sur La Table cooking school among other delicious escapades. We are happy to have him home!

First on the list of Zoom Classes available to the public will be "Cook the Harvest, Traditional Thanksgiving Sides with a Fresh Twist", live on Friday November 20 at noon. Founder, Gracie Cavnar will be joining Carlos at the stove to share tips and tricks to up your turkey day game! The class is $25 and there will be mise en place kits with fresh ingredients available for andvance purchase in the Hope Farms HTX online farm store. Class is limited to 40 students. Book your spot today.

Put a Badge On It!

Recipe for Success
Vote 0 Votes

Thumbnail image for Girl Scouts_1.jpgThe San Jacinto Council Girl Scouts have found their Recipe for Success! They are arriving to RecipeHouse in droves to earn prized culinary and nutrition badges, including our coveted VegOut! patch.

It's no secret that Recipe for Success Foundation is the premier host to help children acquire life-long cooking skills in a healthy and fun atmosphere. The Girl Scouts were among the first to discover this a decade ago. Now about 50 Scouts a week fill RecipeHouse to learn our hallmark healthy and delicious recipes and cook their way toward GSUSA Badges. Carried home by Daisies, Brownies, Juniors, Cadettes, Seniors and Ambassadors, the aromas of our healthy snacks and simple meals permeate Houston's family kitchens and dinner tables. Girl Scout troops can learn cooking skills alongside professional chefs, or design their own badge or journey workshops. We even have a special VegOut! patch. Contact us to plan a class for your troop or meeting, or visit the San Jacinto Girl Scouts Council Information Network to register for one of the already-scheduled classes held throughout the year.

These healthy learning opportunities aren't limited to scouts--anyone can join in the fun! Now other youth groups have picked up the scent and made their way to RecipeHouse. The Jack & Jill Woodlands Chapter and a local National Charity League chapter of ninth grade girls have put their aprons on, too. We offer customizable cooking classes for all ages designed for you and your friends, family and coworkers at both RecipeHouse and Hope Farms. If you are interested in booking a cooking class, give us a shout at (713) 520-0443 or info-at-recipe4success-dot-org

So What? Girl Scout Journey This Summer

Volunteer Ambassador
Vote 0 Votes

girl scouts.jpgRecipe For Success partners with the San Jacinto Council of Texas to lead Senior Girl Scouts through this amazing hands-on experience with sessions at both Hope Farms, our 7-acre farm just south of loop 610, and RecipeHouse, our teaching kitchen in the Museum District. Sow What is a social issue awareness program, which counts towards the Harvest Award, their highest achievement.
In the Sow What? Journey, Scouts learn about food--how and where it's grown, processed, distributed, and consumed-- and why it matters. Participants follow their food from the farm to the table, while learning the processes, skills, and considerations to grow, purchase, and create meals on their own. The girls are then asked to prepare and host a meal for their families using ingredients they have harvested and prepared and to provide a short presentation about the role urban agriculture plays in food accessibility solutions and food choices.

So What? Journey for Girl Scouts

Monday through Friday, June 4-8, 2018
9 a.m. to noon at Hope Farms
$165

For more information and to register, please contact: [email protected]

Register for Summer Camp 2018

Volunteer Ambassador
Vote 0 Votes

RecipeHouse Kiddos.jpgKids, ages 8-12, take an adventure through their taste buds and minds with our RecipeHouse healthy cooking summer camp! Choose from three deliciously fun food adventures!

Marco Polo - Discover tastes & culture from Polo's journey along the Silk Road.

Eat This! - Create wacky store ready food product & compete to get it on the shelf.

Super Foods - Super Food Heroes come to life through recipes and comic strips.

Monday - Friday: 9am - 3pm, $395/week.

Classes are taught by a chef educator who is certified in Seed to Plate Nutrition Education™ instruction, and camp fees include daily lunch and snacks, all supplies and materials, and walking fields trips to a community garden.

MORE INFORMATION

EatThis! Summer Camp 2017

Volunteer Ambassador
Vote 0 Votes

IMG_3151.JPGThere's no place like RecipeHouse in the summer. Our Seed-to-Plate Nutrition Education™ programs don't end on the last day of school, they just turn the page to a new chapter: summer camps! In our themed camps, kids learn how to easily prepare and enjoy healthy foods, and during visits to Hope Farms they see how their favorite new foods are grown and harvested.

In June, our Eat This! camp, inspired by Marco Polo's journey on the Silk Road, explored the culinary cultures of Greece, Italy, India, and China. Campers earned stamps in their passports for making a delicious dish that celebrated each country With fresh produce from Hope Farms, children cooked up Greek salad, Italian homemade pasta with tomatoes and kale, and Chinese stir fry. Times between meals were used to learn about Marco Polo's journey and the different countries and cultures which he visited. With the help of these stories, the kids learned that these unknown food and cultures were not 'weird' but rather 'different' versions of many things they already loved.

Danielle, a camp helper, says "I'm always surprised at how much the kids love the curry we make. It just goes to show how kids can like all different types of foods if they just try them".

Another camp counselor noticed that kids who at the beginning did not care for tomatoes, were eating the Hope Farms cherry tomatoes like candy!

"The favorite day for our Marco Polo campers was definitely the last day in China", says Danielle. Each kid created their own version of stir fry and all of the campers sat in a circle- traditional Chinese family style. This last meal marks the end of camp and represents the family that the campers have created during the week!

At Recipe for Success we make it our mission to change the way children see and appreciate healthy foods, and camps at the RecipeHouse are no different. For more details about upcoming programs, contact [email protected]

Summertime Fun for Kids

Volunteer Ambassador
Vote 0 Votes

S2P_SummerCamp knife skills.jpgThere's no place like RecipeHouse for the summertime!

Imagine this scene at home - kids in the kitchen preparing a deliciously healthy snack for the family to enjoy. Making it a reality is easy if you register for one of our fun-filled Summer Camps at RecipeHouse or Hope Farms. Campers spend the week learning about cooking and gardening.

Choose from the original Eat This! Camp combination of cooking and gardening and product development; Eat it! Food Adventures with Marco Polo discovering cuisines from Italy, Greece, Turkey, India and China; Super Foods bringing super food heros life; Farm Camp exploring urban farming, art, worms, and more; or Sow What? Girl Scout Camp celebrating food, the planet, and sisterhood.

Enrollment is open to all children ages 8-12. Find camp dates and program details on our EatThis! Summer Camp site page and check out additional details in our Summer Camp Flyer below.

Summer Camp Flyer 2017.pdf

Back to School

Justin Kouri
Vote 0 Votes

Hot Sandwich.JPG
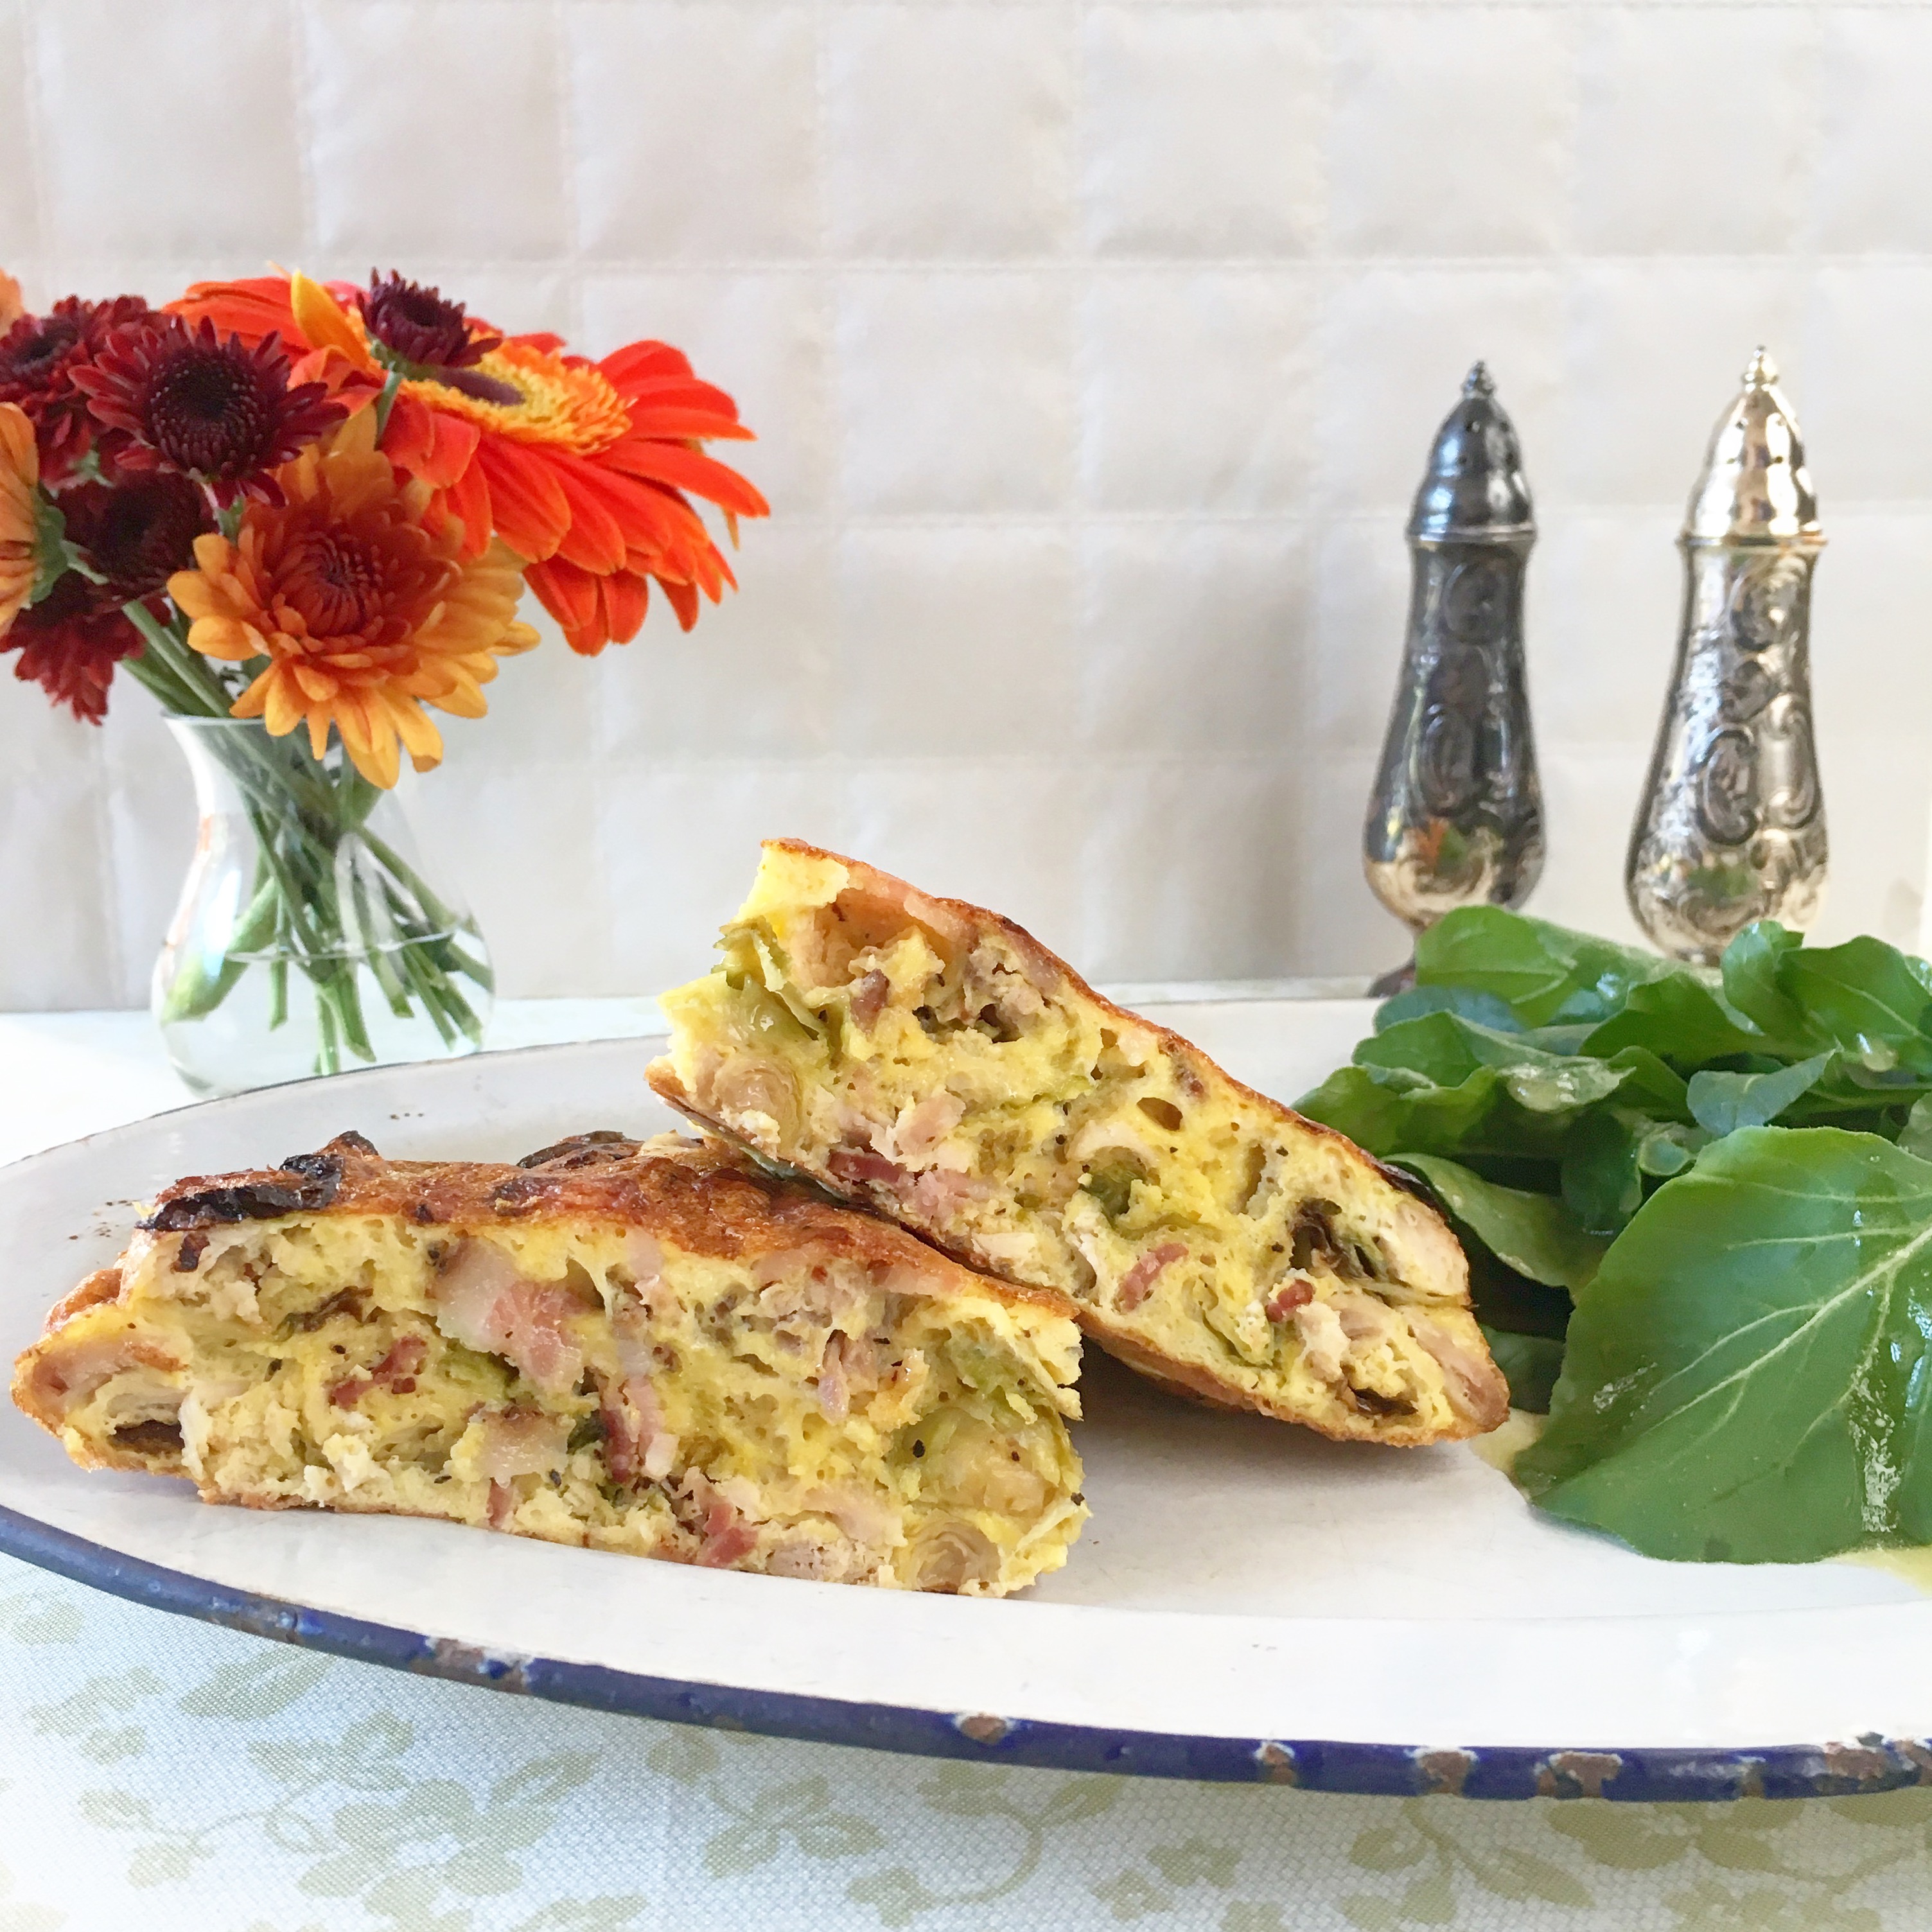
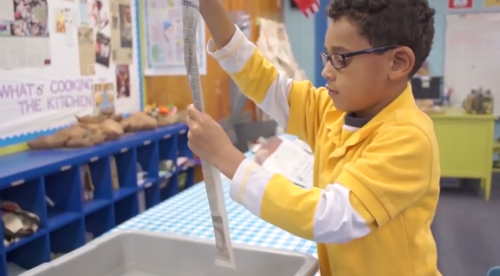
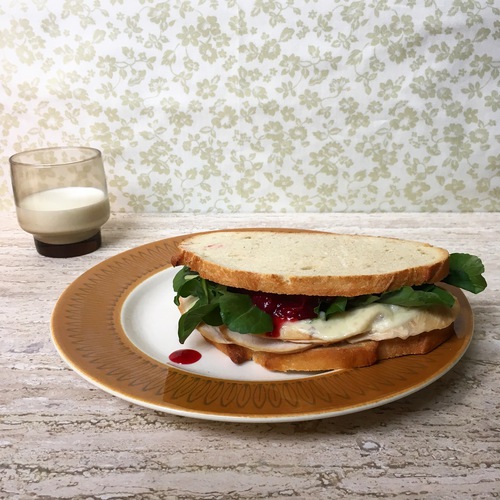
Tired of leftovers yet? Send the kids to school with what's sure to be the coolest sandwich in the cafeteria. Maybe pack an extra for your lunch too!


Hot Turkey Sandwich

Yields 4 servings

Additional Cost: $4.32


Ingredients

8 slices whole wheat bread

2 cups leftover turkey breast, sliced thinly

8 slices provolone cheese

½ cup leftover cranberry sauce

1 cup arugula

4 teaspoons Dijon mustard


Procedure

1.) Preheat oven to 350F.

2.) Place 8 slices of bread on a sheet tray, 1 inch apart. Each sandwich will be comprised of 2 slices of bread.

3.) Put sliced turkey on top of 4 slices of bread. Make sure to cover the slices evenly. Each of these 4 slices will be the base of a sandwich.

4.) Arrange 2 slices of cheese on top of sliced turkey. 4 slices of bread should have nothing on them.

5.) Place the sheet tray in the oven and cook for 15 minutes, or until the turkey is warmed throughout and the cheese is melted.

6.) Remove from oven. Spread 2 tablespoons of cranberry sauce over each sandwich half with melted cheese.

7.) Spread 1 teaspoon of Dijon mustard on each toasted slice of bare bread.

8.) Divide arugula among the halves with turkey and cheese on them.

9.) Close the sandwich with the Dijon mustard side of the remaining slices face down. ENJOY! 

Start 2017 by Vegging Out!

Justin Kouri
Vote 0 Votes

Frittata.JPG

It's good for your mind to take what you did in 2016 into 2017. It's good for your health to VegOut! Start the new year right and download the app! Take the challenge!

www.vegoutwithrfs.org

A New Beginning Frittata

Yields 4 servings

Additional Cost: $1.30


Ingredients

2 tablespoons olive oil

1 cup left over turkey

1 cup left over Brussels spouts

6 eggs

Salt and pepper, to taste


Procedure

1.) Start your oven's broiler. It will take 10-15 minutes for it to heat completely. Position one of your oven rack's just below the coils/flame.

2.) In a medium non-stick skillet, heat olive oil over medium heat.

3.) When oil begins to simmer, add turkey and Brussels sprouts. Cook until completely warmed.

4.) Meanwhile, whisk together eggs, salt and pepper in a medium bowl.

5.) When leftovers are warm, add egg mixture to skillet.

6.) Continue to cook stovetop while stirring until the eggs thicken and become clumpy.

7.) Transfer skillet to the oven, just below the broiler. Keep in mind that the frittata will rise - make sure that there is enough space between the rack and the heat source. 

8.) Do not take your eyes off the frittata, it will cook quickly. Once the top is golden brown, remove from the oven and cool for 10 minutes.

9.) Using a rubber spatula, loosen the frittata from the pan and slide onto a clean cutting board.


10.) Divide among guests. ENJOY!

A Hip Goodbye to 2016

Justin Kouri
Vote 0 Votes

Holiday Ramen.JPG

Celebrate 2016 by taking your tastes buds on a journey of epic proportions! (They don't need to know you didn't spend an epic amount!) 


Holiday Ramen

Yields 4 servings

Additional Cost:  $2.88


Ingredients

8 cups homemade turkey stock

2 teaspoons onion powder

2 teaspoons garlic powder

2 teaspoons ginger, ground

2 teaspoons black pepper, ground

1 pound dried rice noodles

4 button mushrooms, sliced thinly

1 cup leftover turkey, sliced

2 eggs, hardboiled, peeled and halved lengthwise

¼ cup green onion, sliced thinly

1 lime, quartered (for garnish)


Procedure

1.) Prepare the broth by combining stock, onion powder, garlic powder, ginger and pepper in a medium pot.

2.) Bring stock mixture to a boil and reduce until 6 cups of liquid are left. Remove from heat.

3.) Drop dried rice noodles into the stock liquid, cover pot for 5-10 minutes, or until the noodles are soft.

4.) Remove the noodles and distribute among bowls.

5.) Add mushrooms and turkey slices to the warm stock. Return to medium heat and cook until warmed throughout, about 5 minutes.

6.) Remove turkey and mushrooms from the stock.

7.) Compose the ramen. First, distribute stock between the bowls.

8.) Top the stock and noodles with turkey slices, mushrooms, half of a hardboiled egg, green onions and lime wedge. ENJOY!

Heart Warming Turkey Soup

Justin Kouri
Vote 0 Votes

Soup.JPGThis soup doesn't require a lot of attention nor additional cash. We bet you can find the change in your sofa cushions after your family leaves. 


Turkey & Vegetable Soup

Yields 4 servings

Additional Cost: $1.23


Ingredients

6 cups homemade turkey stock

2 cups leftover dark turkey meat

2 carrots, reserved from roasting the turkey

2 stalks celery, sliced thinly

8 ounces canned white beans

½ cup brown rice, cooked

¼ cup parsley leaves

Salt & pepper, to taste


Procedure

1.) Pour turkey stock in a large pot and heat over high heat. Cook until reduced to 4 cups.

2.) Add turkey meat, carrots, celery, beans and brown rice to the reduce turkey stock.

3.) Continue cooking until soup contents are warmed.

4.) Taste and season with salt and pepper if necessary.

5.) Divide among bowls. ENJOY!

Some Healthy Holiday Southern Comfort

Justin Kouri
Vote 0 Votes

Sweet Potato Biscuits.JPG

Keep the holiday cheer going with this rich rendition of a southern classic. It might look like a million bucks, but we're sure your pocket book will thank us!


Sweet Potato Biscuits & Gravy

Yields 4 servings

Additional Cost: $2.45


Ingredient

Biscuits

1 cup leftover sweet potato puree

2 eggs

1 lemon, juiced

2 cups all purpose flour

1 teaspoon baking powder

½ teaspoon salt

¼ teaspoon pepper


Gravy

1 tablespoon olive oil

4 button mushrooms, sliced thinly

1 cup homemade turkey stock

1 cup leftover gravy

Salt and pepper, to taste


Procedure

Biscuits

1.) Preheat the oven to 350F.

2.) Combine sweet potato puree, eggs and lemon juice in a large bowl. Using a wooden spoon, stir until smooth.

3.) In a separate bowl, whisk together flour, baking powder, salt and pepper.

4.) Add half of the dry ingredients to the sweet potato mixture and stir to combine.

5.) Add the remaining dry ingredients to the sweet potato mixture and stir until completely incorporated.

6.) Transfer the dough to a lightly floured surface and roll out to ½ inch thickness.

7.) Using a 2-inch punch, cut out 8 rounds and place on a parchment lined sheet tray.

8.) Bake biscuits for 25 minutes, or until they are golden brown. Set aside.


Gravy

1.) While the biscuits are baking in the oven, heat oil in a large skillet over medium high heat.

2.) When oil begins to shimmer, add the mushrooms in an even layer. Let them sit for a minute so that they get a nice brown color. Stir and continue to cook for 4-5 minutes.

3.) Add stock to the skillet and scrap off anything that stuck to the bottom of the skillet.

4.) Add the left over gravy to the skillet and bring to a boil. Continue to cook for 10 minutes.

5.) Once the gravy thickens, remove from heat and season with salt and pepper if necessary.


Assemble

1.) Place two biscuits on each plate. 

2.) Pour or spoon gravy over biscuits. ENJOY!


What's A Bird Without Some Sides?

Justin Kouri
Vote 0 Votes

Holiday Sides.JPG

While your turkey is resting and your gravy is simmering, it is the perfect time to crank up the oven and quickly roast some Brussels sprouts. We like to prepare all our vegetable the night before, so when it's show time, all we have to do is pop them in the oven!

We've even taken it a step further - the cranberry sauce can be prepared the night before, as well as roasting the veg for the sweet potato puree. Blitzing the potatoes with piping hot stock brings them back to life!

Citrus Roasted Brussels Sprouts

Yields 4 servings plus leftovers (about 8 cups)

Cost: $7.66

Ingredients

2 pounds Brussels sprouts, trimmed and halved

4 slices uncured bacon, sliced thinly

2 tablespoons olive oil

salt and pepper, to taste

1 orange, zested


Procedure

1.) Preheat the oven to 450F.

2.) Combine Brussels sprouts, bacon, olive oil, salt and pepper in a large bowl.

3.) Toss until evenly coated and transfer to a lined sheet tray.

4.) Roast for 25 minutes, shaking the tray every 10 minutes to make sure the sprouts don't stick. 

5.) When the sprouts are finished, remove them from the oven and zest the orange over them. The heat will extract the orange oil from the zest. ENJOY!


Spicy Cranberry Sauce

Yields 4 servings plus leftovers (about 4 cups)

Cost $2.68

Ingredients

12 ounces cranberries

2 oranges, zested

1 jalapeno, minced

¼ cup brown sugar

½ teaspoon cinnamon

1 cup water


Procedure

1) Combine all ingredients in a medium saucepan.

2.) Over high heat, bring contents to a boil, stirring occasionally.

3.) Reduce heat to simmer and continue cooking for 1 hour, until sauce is bright read and consistency of jam.

4.) Cool completely.  ENJOY!

*Cranberry sauce can be made 3 days in advance

Sweet Potato Puree

Yields 4 servings with leftovers (about 8 cups)

Cost: $1.79

Ingredients

4 sweet potatoes, peeled and cut into 1" cubes

1 green apple, peeled and cut into 1" cubes

1 onion, peeled and cut into 1" cubes

2 tablespoons olive oil

1 teaspoon cumin seeds

1 teaspoon coriander seeds

salt and pepper, to taste

1 cup chicken stock


Procedure

1.) Preheat oven to 450F.

2.) Combine potatoes, apple, onion, olive, cumin, coriander, salt and pepper in a large bowl.

3.) Toss until evenly coated.

4.) Transfer to a lined sheet tray and roast for 30 minutes. (I recommend roasted these at the same time you put your turkey in the oven.)

5.) Meanwhile bring stock to simmer in a small pot over medium low heat.

6.) Once the roasted potato mixture comes out of the oven and cools for 10 minutes, transfer to a food processor or blender. Puree with warm stock until smooth.

7.) Adjust seasoning if necessary. ENJOY!

Oh SNAP! Budget Friendly Holiday Recipes

Justin Kouri
Vote 0 Votes

Turkey.JPG

Oh SNAP! It's the holidays! 

You've already spent a small fortune on gifts for friends, family, coworkers and everyone else. Now you need to spend even more to feed everyone?!

Don't worry. We have tons of recipes for a feast and leftovers, making sure you don't break the bank this holiday. Follow our posts, cook along with us and let us know what you think!

We're going to get started with the heavy hitters. Here's our recipe for a Roasted Turkey. Happy Holidays!!! 


Simple Roasted Turkey & Gravy

Yields 4 servings, plus leftovers

Cost: $16.31

We know it looks like a lot of ingredients and it is - we're making a feast! The stuffing and roast are playing several roles: they're keeping the bird moist, creating the base for our gravy and providing us with perfectly roasted vegetables to use with our leftovers.


Ingredients

Brine

2 cups brown sugar

¼ cup black peppercorns

¾ cup kosher salt

2 oranges, peeled (reserve actual fruit)

1 lemon, peeled (reserve actual fruit)

6 cloves garlic, minced

2 gallons cold water

12 pound turkey


Stuffing

2 oranges, reserved from brine, quartered

1 lemon, reserved from brine, quartered

6 cloves garlic, smashed

½ bunch thyme, fresh


Roast

4 carrots, peeled

2 parsnips, peeled

1 onion, peeled and cut into 1 inch pieces

4 button mushrooms

6 cloves garlic

4 tablespoons butter, melted


Gravy

Dripping from turkey, all vegetables removed (reserve carrots, parsnips and mushrooms for later use)

¼ cup all-purpose flour

6 cups homemade chicken stock

salt and pepper, to taste


Procedure

Brine turkey

1.) Combine all ingredients except the turkey in a large stockpot. Stir to combine.

2.) Add turkey to the brine.

3.) Cover and place in refrigerator for 12-24 hours. 


Roast turkey

1.) Preheat oven to 450F.

2.) Remove turkey from brine and soak in cold water for 20 minutes. Discard the brine.

3.) Rinse turkey again to remove the additional salt and sugar. Pat dry.

4.) Stuff the turkey with oranges, lemon, garlic and thyme. Tie legs together.  

5.) Brush turkey with butter. Set aside.

5.) Place carrots, parsnips, onion, mushrooms, garlic and ½ cup of water on a sheet tray. Place a rack on top of the vegetables, and the turkey on top of that.

6.) Roast turkey for 30 minutes.

7.) Lower the temperature to 350F and cover the breasts with aluminum foil. Cook for another 1.5 - 2 hours, or until the internal temperature registers 165F.

8.) Remove from heat and rest for 30 minutes before carving. Enjoy!


Gravy

1.) Using oven mitts, transfer the turkey drippings to a medium saucepan. 

2.) Heat the drippings over medium heat.

3.) When the drippings begin to bubble, add flour and whisk until smooth.

4.) Continue whisking for 5 minutes. This process removes the raw flavor from the flour.

5.) Pour 1 cup of stock into the flour mixture and whisk until smooth.

6.) While whisking, add remaining stock to the pot and bring to a boil.

7.) Once the gravy boils, reduce to a simmer and continue cooking for 15-20 minutes, or until the gravy is thick.

8.) Season with salt and pepper. Serve with turkey. ENJOY! 

Delicious Fun with Girl Scouts

Gracie Cavnar
Vote 0 Votes

Girl Scouts with Pasta.jpegThe San Jacinto Council Girl Scouts have found their Recipe for Success! They are arriving to RecipeHouse in droves to earn prized culinary and nutrition badges, including our coveted VegOut! patch.

It's no secret that Recipe for Success Foundation is the premier host to help children acquire life-long cooking skills in a healthy and fun atmosphere. The Girl Scouts were among the first to discover this several years ago. Now about 50 Scouts a week come to RecipeHouse to learn our hallmark healthy and delicious recipes. Carried home by Brownies and Ambassadors, the aromas of our healthy snacks and simple meals permeate Houston's family kitchens and dinner tables.  Now other youth groups have picked up the scent and made their way to RecipeHouse. The Jack & Jill Woodlands Chapter and a local National Charity League chapter of ninth grade girls are putting on their aprons this month.

These healthy learning opportunities aren't limited to organizations--anyone can join in the fun! We offer customizable cooking classes for all ages designed for you and your friends, family and coworkers.  If you are interested in booking a cooking class at RecipeHouse, give Chef Justin a shout at (713) 520-0443 or justinkouri -at- recipe4success.org

Put A Patch On It

Gracie Cavnar
Vote 0 Votes

Girl Scouts_1.jpgWe have special classes at RecipeHouse for Girl Scouts to earn requirements toward GSUSA Badges.  Girl Scout troops can learn cooking skills alongside professional chefs, or design their own badge or journey workshops.  We even have a special VegOut! patch.  Contact Justin Kouri to plan a class for your troop or meeting, or visit the San Jacinto Girl Scouts Council Information Network to register for one of the already scheduled classes beginning September 10.

Start the Day Healthy

Recipe for Success
Vote 0 Votes

Granola.jpgYep, its that time of year again SCHOOL DAYS.  The morning hustle of rousting sleepy heads from bed, getting dressed, throwing down breakfast, finding the backpack and out the door to beat the bell.  But in the flurry of activity, we encourage you to pay some attention to breakfast.  According to a 2005 study published in "Physiology and Behavior," eating a healthy breakfast in the morning has beneficial effects on memory -- particularly short-term -- and attention, allowing children to more quickly and accurately retrieve information. Children who eat breakfast perform better on reading, arithmetic and problem-solving tests. Eating breakfast also positively affects endurance and creativity in the classroom, reports Abdullah Khan in his 2006 dissertation for Murdoch University on the relationship between breakfast and academic performance.

Here's our idea of a healthy start to the day that you and the kids can make together over the weekend and enjoy all week long.  If you're running behind, throw the granola in a paper cup to eat on the way.

GRANOLA (Yield 3 cups)

Ingredients:

  • 2 cups rolled oats
  • ½ cup pumpkin seeds
  • ½ cup cranberries
  • 2 teaspoon pumpkin pie spice
  • ½ teaspoon salt
  • 3 tablespoon coconut oil
  • 3 tablespoon brown sugar
  • 3 tablespoon honey

Procedure:

  • Preheat oven to 350°F and line a sheet pan with parchment paper.
  • Combine oats, seeds, dried cranberries, pumpkin pie spice and salt in a large bowl.
  • In a separate medium bowl, whisk together coconut oil, brown sugar, honey and vanilla. Add to oat mixture and stir until coated.
  • Pour the mixture onto the prepared sheet pan. Spread the mixture evenly on the sheet pan.
  • Cook for 5 minutes. Remove from the oven. Stir the granola. Return the pan to the oven. Cook for 5 more minutes.
  • Remove from the oven. Let cool completely.

Have an entire week of healthy breakfasts:

  • Try it plain
  • Over Greek yogurt
  • OR...microwave your favorite fruit for 2 minutes and top with this awesome granola!!!

Pumpkins-More Than Fall Food!

jdavid
Vote 0 Votes

We bring to you our Pumped-Up Pumpkin Parfait created by our one and only Chef Justin Kouri.  This Pumpkin Parfait is packed with vitamin A, fiber, vitamin C and will leave you feeling full and satisfied.Photo Credit: Justin Kouri

Two of the main ingredients in this Pumped-Up Parfait are pumpkin puree and oats.  Now, here is the run down on why these two delicious ingredients are also nutritious too .  Did you know that mashed pumpkin is packed with Vitamin A, a nutrient that helps you see in dim lighting, according to the National Institute of Health and also contains 3 grams of fiber per 1 cup serving and only 49 calories. In addition it is full of that vitamin we all love, vitamin C! In one cup of cooked pumpkin, you can find almost 20% of the daily intake of vitamin C for the average woman.

Pumpkin Parfait 2

What about the oats, you say?! Oats are low in fat, high and protein and are a great way to combat heart disease and diabetes. They will keep you full and give you the energy you need to celebrate National Oat Day in style!

A Veggie Filled Culinary Adventure at RecipeHouse

jdavid
Vote 0 Votes

Chef Antoine Ware, of Harold's in the Heights, dazzled guests with a vegetable focused menu in honor of National Nutrition Month and Recipe for Success Foundation's healthy eating initiative VegOut!

Harold's is a farm-driven southern cuisine restaurant located in the heart of the Heights on 19th Street. Executive Chef Antoine Ware brings his New Orleans flare to Owner Alli Jarrett's South Carolina classics to create upscale southern dishes in a friendly environment. The 95-year-old building where Harold's resides on the second floor, features original brick walls, barn wood tables and local artists' art. Their rooftop terrace is the perfect place for brunch, lunch or dinner as diners can enjoy the hustle and bustle of Heights shoppers from a bird's eye view.

His menu took diners on a delicious adventure beginning with whole wheat flatbread with spinach, tomato and basil peston and exquisit tuna tartar. The Gumbo Z'Herbs with smoked turkey tickled tastebuds and was filled with nutritious greens with a spicy kick! Keeping with the local and delicious, guests were then treated to seared gulf snapper with turnips, local mushrooms, collard green and roasted bell pepper coulis! What a delicious evening! 

Be sure to visit Chef Antoine at Harold's in the Heights

FullSizeRender-6.jpg

Chef Surprise MenuFullSizeRender-3.jpg

Flavorful Balance Through Contrast: Chef Surprise with The Del's Chef Albert Vazquez

Shannon Smith
Vote 0 Votes

Last night, Recipe for Success Foundation kicked-off the Chef Surpíse season with Chef Albert Vasquez of The Del, Studewood Hospitality Group's neighborhood restaurant nestled among three of Houston's most fun and family-friendly neighborhoods, Briargrove, Tanglewood and Memorial.

IMG_0512.JPG

Chef Albert, a South Texas Coast native presented unique flavor profiles through his concept of balance through contrast with dishes like his pickled bratwurst with cowboy bread, camarones a la plancha marinated in a grilled vegetable sofrito and slow-cooked carnitas dressed with a black garlic mole. He finished off the evening with exquisite smoked marranitos, a gingerbread like cookie made of smoked flour and a cafe quemada, a cold coffee sweetened with a dulce de leche of condensed milk. 

Chef Albert's down-home roots and experience appealed to Houston natives and brought a casual, yet elegant feel to RecipeHouse's Chef Surprise kick-off, an intimate 3-course dining experience including wine at RecipeHouse on the First Monday of the month starting at 6:30 pm. Chef Albert began his feat in the restaurant industry when he was only 15 years of age shucking oysters and cleaning fish in Port Aransas. He then found himself training under Scott Tycer at Aries and Gravitas before serving as culinary director for Dish Society.

IMG_0519.JPG

RecipeHouse, home to private-events and cooking classes benefitting Recipe for Success Foundation, hosts Chef Surprise to engage chefs and the community as they fight childhood obesity with a fun, culinary adventure. Chef Surprise has featured past chefs including, Omar Pereney, of Peska, Randy Evans, Rebecca Masson of Fluff Bake Bar and Brandi Key of Coppa Osteria and Punk's Simple Southern Food

For more information on how to join RecipeHouse for our upcoming Chef Surpríse event, click here.

Post Oak HS J-Term

Sandra Cook
Vote 0 Votes

Houston's Post Oak High School seeks to provide unique opportunities for students to cultivate real-life experiences. The school's teaching methods nourish students' diverse interests, helping students identify personal passions and actively prepare for university and for life beyond school. For three weeks each January, Post Oak High School students participate in an intensive study program, called J-Term.

So when Post Oak High School teacher Benjamin Preston contacted Chef Justin Kouri, our Culinary Education Coordinator about doing a J-Term course with Recipe House, Chef Justin welcomed the idea and had a blast hosting the 16 high school students in a three-week course in the culinary arts. "My goal was to give the students a comprehensive view of the food industry," says Chef Justin. 

PostOakHS2_bread slicing_For Blog.jpeg

In addition to teaching the students cooking methods, knife skills and preparation techniques, Chef Justin organized several fascinating field trips. "The first was a visit with Chef Jon Buchannan at his restaurant Trevisio in the Texas Medical Center," says Chef Justin. Here, the students toured the restaurant and kitchen and learned about the economics of food costs in the restaurant industry, including sourcing produce, meats, dry goods and formulating mark-ups in terms of market pricing and operating the business of a restaurant.

The next field trip was truly located in a field! Chef Justin took the students to Finca Tres Robles, the urban farm operated by Tommy Garcia-Pratts and his brother Daniel Garcia-Pratts. At the farm, Tommy taught the students about the costs of growing produce and how to price it at market. The students also ventured out to volunteer in the Recipe for Success classroom at Rodriguez Elementary and got to experience how elementary kids engage with our Seed-to-Plate Nutrition Education™. 


PostOakHS6_farm visit _For Blog.jpeg

Back at RecipeHouse, the students developed their culinary chops. To hone their skills, Chef Justin broke the class into small groups and had each prepare and execute a three-course meal. The students' work was evaluated for quality and presentation.

Chef Justin explains he has years of experience working with professional chefs and has worked with elementary school aged kids for the past two years in Recipe for Success school programs and summer camps, but this was his opportunity to work with high schoolers. "It was exciting that the students were so motivated to take this course," says Chef Justin. "It was great to see their higher-level thought processes and more advanced responses to the lessons. I felt like I had my own creative team to collaborate with, so I found it very rewarding as well." 

Email Chef Justin about ongoing classes and custom classes for your group.

SAVORY BAKED EGGS

Shannon Smith
Vote 0 Votes

TRY SOMETHING DELICIOUS FROM RECIPEHOUSE!

Chef Justin loves to share his deliciously nutritious recipes from RecipeHouse. Let us know what you think, or better yet--send us your favorites!

Start your day (or the weekend) with his flavorful satisfying SAVORY BAKED EGGS. What's your favorite breakfast creation? Send your tastiest recipe to [email protected]. You can also check out Justin's past recipes on the RecipeHouse blog or sign up for a class to learn first hand how to create tasty and nutritious meals and snacks.

RecipeChallenge_Feb 2016_Baked Eggs 2.JPG 

Savory Baked Eggs

Recipe & Photos by Justin Kouri

 Ingredients

2 Tbsp olive oil

1 onion

2 cloves garlic

28 ounces crushed tomatoes

1 Tbsp fresh thyme

1 Tbsp + 1 tsp fresh oregano, divided

1 tsp crushed red pepper flakes

3 cup fingerling potatoes, boiled

4 eggs

1 cup fontina, shredded

 RecipeChallenge_Feb 2016_Baked Eggs 1.JPG

Procedure

Preheat oven to 400F. Heat olive oil in large skillet over medium heat. Add onion and garlic and sautee until onions are translucent, about 5 minutes. Add crushed tomatoes, thyme, oregano and red pepper flakes, bring to a boil, reduce to a simmer and cook for 5 minutes.

Meanwhile, quarter potatoes and distribute among 4 large ramekins. Divide the tomato sauce among the ramekins. (This recipe can be prepared up to this point in advance.) In the center of each ramekin make a well within the potatoes and place the egg. Sprinkle with fontina and bake for 15 minutes or until egg is cooked, but yolk is still runny. Remove from oven and rest for 5 minutes. (This part is important because the egg will continue to cook.) Serve with toast points.

Yield: 4 servings

Prep time: 15 minutes

Active cooking time: 15 minutes

Total time: 30 minutes

Skill level: Easy

Don't be scared of your CSA Share!

Shannon Smith
Vote 0 Votes

Raining Veg.JPGVeg Basket.JPGDoes that pile of king-sized greens and gnarly root vegetables intimidate you? Even if you know your way around a kitchen, the variety and volume in a CSA share can be a little mind-boggling. "You get a lot of veggies all at once in a CSA," says RecipeHouse chef, Justin Kouri, "many more than you would usually pick up at the grocery store."

Chef Justin is excited about empowering people the knowledge to handle their seasonal surplus of veggies. "I want to help folks make good on their intentions to eat greener and healthier," he says. Join Justin at one of his upcoming classes that focus specifically on helping you cook up your CSA share at RecipeHouse. READ MORE about these and other 2016 classes at RecipeHouse.

In a blow-out: Start the New Year right and sign up for the CSA Cooking class on January 12 today or email Chef Justin about upcoming CSA classes slated for February 9 and March 8.

Are you intimidated by that pile of king-sized winter greens and gnarly root vegetables? Even if you know your way around a kitchen, the variety and volume in a CSA share can be a little mind-boggling. "You get a lot of veggies all at once," says our RecipeHouse Chef Justin Kouri. "When you are first getting into the slow food movement, that CSA share often delivers a lot more veggies that you would usually pick up at the grocery store."

Chef Justin is excited about empowering people with the knowledge to handle their seasonal surplus of veggies. "I want to see people to make good on their intentions to eat greener and healthier," he says. Join him for a upcoming CSA Class at RecipeHouse. 

"Especially during the winter, many vegetables are not-so-familiar," says Chef Justin. "My CSA classes feature easy, healthy recipes that are great for singles, couples and families. And I cover simple ways to preserve some of that fresh produce for later, inlcuding pickling and freezing techniques." 

Expect to learn a variety of recipes and tricks to make the most of your produce bounty. "You'll definitely come away with more than one recipe per veggie--like several ways to use all that kale. We'll also discuss what you can eat raw or simply marinate and then serve.

 The recipes will include plenty of savory options, but also some sweet options. "And, of course, each class ends with a feast of the foods we prepare in class. I'll send you home with your preserved foods, along with recipes and new-found knowledge and inspiration to make the most of your CSA shares," says Chef Justin.

 Start the New Year right and sign up for the CSA Cooking class on January 12 today or email Chef Justin about upcoming CSA classes slated for February 9 and March 8. 


January Recipe Challenge!

Sandra Cook
Vote 0 Votes

RecipeChallenge_Jan2016_Smoothie 2 crop_FOR BLOG.jpeg


Chef Justin loves to share his deliciously healthy recipes from RecipeHouse.  Let us know what you think, or better yet--send us your favorites!  

Kick off 2016 with this vitamin-packed Pink Pom Pom Smoothie. Try it in the morning to start your day off right or to replenish after a good workout. What's your favorite smoothie concoction? Send your tastiest recipe to [email protected] You can also check out Justin's past recipes on his RecipeHouse blog or sign up for a class to learn first hand how to create deliciously healthy meals and snacks. 

Pink Pom Pom Smoothie 

Recipe by Justin Kouri RecipeChallenge_Jan2016_Smoothie 1.JPG

Ingredients 

1 cup pomegranate juice 

2 small beets, boiled 

1 orange, zestedsegmented & juiced 

1 cup whole milk Greek yogurt 

2 Tbsp honey 

2 Tbsp ginger, microplaned  

1 cup blueberry, frozen 


Procedure 

Combine pomegranate juice and cooked beets in a high-powered blender. Blitz until smooth, about 5 minutes. Add orange zest, segments, juice, yogurt, honey and ginger to the blender and continue to blitzAdd frozen cranberries and pulse until just incorporated.  


Yield: 3½ cups  

Prep time: 15 min 

Active cooking time: N/A   

Total time: 15 min 

Skill level: Easy 


December Recipe Challenge!

Sandra Cook
Vote 0 Votes

Do you have a prized recipe for a deliciously healthy holiday treat? Join in the fun of Chef Justin's recipe exchange! Each month, he shares his tantalizing recipes while our readers, followers and fans - that's YOU - send in favorite recipes!

For some holiday fun, try Justin's luscious Chocolate Beet Cookies, made with smart substitutions that cut calories and boost nutrition. What's your favorite healthy holiday cookie recipe? Send your tastiest recipe to [email protected] by December 31 and you could win the November Recipe Challenge and be included in next year's VEGOUT! COOKBOOK. You can also check out Justin's past recipes on the Recipe House blog.

Chocolate Beet Cookies

Recipe & photos by Justin Kouri

Thumbnail image for RecipeChallenge_Beet Cookies Close-up FOR BLOG.jpg

The holidays are loaded with unhealthy landmines, so I like to use baking substitutes when I can. Avocados are a great replacement for butter. I typically use one avocado in place of one cup of butter. Enjoy this delicious AND healthy holiday treat!

Ingredients

1 cup dried cherries,

1 cup dark chocolate chips

¼ cup coconut oil

1 avocado

½ cup brown sugar

½ cup beets, boiled, peeled & pureed

1 egg

2 tsp apple cider vinegar

1 tsp vanilla extract

2 cups flour

1 Tbsp unsweetened cocoa powder

1 tsp baking soda

½ tsp baking powder

½ tsp salt


Procedure

Preheat oven to 375F.

Place dried cherries in a small bowl. Rehydrate the cherries by pouring boiling water over them. Allow them to rest in the hot water for 10 minutes. Remove and pat dry.

Meanwhile, melt chocolate chips and coconut oil together over a double boiler. Cool for 5 minutes.

Using the paddle attachment of a standing mixer, cream together avocado and brown sugar, about 5 minutes. Stream in melted chocolate and mix until combined. Add beet puree, egg, vinegar and vanilla extract. Mix.

In a separate bowl, sift together flour, cocoa powder, baking soda, baking powder and salt. Add half to the chocolate-beet mixture and mix until combined. Add remaining dry ingredients and mix until completely combined.

Scoop onto prepared sheet tray, about 2 inches apart. Bake for 10 minutes. Cool on rack.  

Yield: 24 cookiesThumbnail image for Thumbnail image for RecipeChallnge_Beet Cookies - FOR BLOG.jpeg

Prep time: 10 minutes

Active cooking time: 10 minutes

Total time: 20 minutes

Skill level: Easy


Chef Justin Wins Risotto Fest

jdavid
Vote 0 Votes

Heartbeet RisottoProving that healthy food can be super delicious, our own Chef Justin Kouri won the competition for taste buds at the recent showdown among Houston's culinary ruling class.  New York-based celebrity chef Rocco Dispirito was just one element that wowed the throng of 800 who turned out at Houston Design Center for the 11th International Risotto Festival. Italian music and wines played backdrop to the coterie of chefs who whipped up tantalizing versions of the Italian specialty.

While guests grazed through the offerings, more than a dozen waited for the judges' decision on top honors. Dispirito led the team in the blind tasting. In the end, it was Justin Kourirepresenting Recipe for Success, who took top prize for his HeartBeet Risotto. Read more here and create your own award-winning risotto dish with the all-veg recipe hereRisotto Fest

November Recipe Challenge!

Sandra Cook
Vote 0 Votes

Holiday cooking season is here!  What a great time to join in the fun of Chef Justin's recipe exchange! Each month, his tantalizing recipes along with his picks of recipes submitted by our readers, followers and fans - that's YOU! For November, try Justin's delicious Sweet Potato Tart, featuring a comforting combo of both sweet and savory flavors. What's your favorite holiday recipe? Perhaps a main course, a side dish or dessert? Send your tastiest recipe to [email protected] by Nov. 30 and you could win the November Recipe Challenge and be included in next year's VEGOUT! COOKBOOK. 

Sweet Potato Tart

Recipe & Photo by Justin Kouri 

This is a very versatile tart; it can be served as a savory OR sweet dish! Whenever you decide to serve it, this twist on traditional ingredients is a great addition to your holiday repertoire. 

Sweet Potato Pie 1 copy_forBlog.jpeg

Ingredients:

Pie Crust

1¾ cup AP flour

1 Tbsp sugar

½t salt

1½ cup butter, cubed & chilled, divided

1½ Tbsp apple cider vinegar

2 Tbsp ice cold water


Filling

2 sweet potatoes

1 apples

1 onion

1 Tbsp olive oil

3 egg yolks

1 tsp cinnamon

¼ tsp nutmeg

¼ tsp cloves

¼ tsp cayenne

½ tsp salt

1 orange, juiced


Topping

3 egg whites

1 tsp vanilla extract

½ tsp cream of tartar

Procedure:

Pie Crust

Combine flour, sugar and salt in the bowl of a food processor. Add ½ cup of butter and pulse until completely incorporated. Add remaining butter, vinegar and water. Pulse until dough just comes together. Wrap in plastic and chill for at least one hour and up to 1 week.

Roll out dough on lightly floured surface. Once the dough is ¼" thick, pick up and place in a greased 10" tart pan. Blind bake for 15 minutes or until golden brown. Cool completely.

Filling

Meanwhile, preheat oven to 400F. Toss potatoes, apple, onion and olive oil in a large bowl. Place on sheet tray and roast for 30 minutes or until fork tender. Put potato mixture in a food processor and pulse until smooth. Add yolks, spices, salt and orange juice to processor and pulse until incorporated.  Add filling to pie shell and bake for 30 minutes. Remove from oven and cool completely.

Topping

Prior to serving, whip egg whites, vanilla extract and cream of tartar in a metal bowl until holds stiff peaks. Top pie. Brulée under broiler or with hand-held flame. 

October Recipe Challenge

Sandra Cook
Vote 0 Votes

Calling all clever cooks! Get in on the fun of Chef Justin's recipe exchange! Each month, his tantalizing recipes along with his picks of recipes submitted by our readers, followers and fans - that's YOU! Try Justin's no-trick tortilla treat for a wholesome Halloween twist. What's your clever and healthy Halloween treat? Send your tastiest recipe to [email protected] by October 31 and you could win the October Recipe Challenge and be included in next year's VEGOUT! COOKBOOK.  

Spooky & Sweet Tortilla Bat _LoRes for Blog.jpeg


Spooky & Sweet Tortilla Cutouts

Recipe & Photo by Justin Kouri

These tortilla cutouts remind me of churros, but aren't fried! Using heart healthy coconut oil and whole-wheat tortillas, make this a fun and healthy activity to do with the entire family!


Ingredients

¼ cup coconut oil

½ tsp vanilla

¼ cup sugar

1 tsp cinnamon

5 whole-wheat tortilla

Spooky & Sweet Tortilla Ghost_LoRes for blog.jpg


Procedure

Preheat oven to 350F.

Combine sugar and cinnamon in a small bowl. Mix and set aside.

Melt coconut oil and vanilla in a small pot over low heat.

Meanwhile, punch out tortillas with Halloween cookie cutters. Lay out on a parchment-lined sheet tray fitted with a cooling rack. Brush tortillas with oil mixture, flip and brush opposite side. Bake for 8 minutes. Remove from oven and quickly sprinkle sugar mixture over tortilla, flip and sprinkle over other side.  Cool completely. 

September Recipe Challenge

Vote 0 Votes

Farroto Ingredients 1.JPGWE GIVE YOU INSPIRING RECIPES - YOU SEND US YOUR FAVORITES!

Join in the fun of Chef Justin's recipe exchange! Each month, his tantalizing recipes along with his picks of recipes submitted by our readers, followers and fans - that's YOU!  Here is Justin's savory risotto-inspired dish made with faro, in honor of Whole Grain Month. What are your go-to, crowd-pleasing weeknight meals that are both doable and delectable? Send your tastiest recipe to [email protected] and you could win the September Recipe Challenge and be included in next year's VEGOUT! COOKBOOK.  You can also check out Justin's past recipes on the Recipe House blog.


Farroto with Mushrooms & Peas

Recipe & photo by Justin Kouri

I've taken traditional risotto and substituted an alternative whole grain. Farro is an ancient grain, a special type of wheat, believed to have originated in Italy. In fact, farro retains a majority of its nutrients after cooked, making it a great source of energy.  On top of that, I've applied a Southeast Asian profile to make this my own.

 Ingredients:

4c vegetable stock

1 - 4" stalk lemongrass, peeled & crushed

¼c olive oil, divided

½lb cremini mushrooms, destemed & sliced thinly

1 shallot, finely minced

2" - ginger, microplaned

1c faro

½c white wine

½c frozen peas, dethawed

¼c lime juice

2T soy sauce

¼c cilantro, chiffonade

Salt & pepper

Procedure:

In a medium sized stock pot, combine vegetable stock and lemongrass. Bring to boil. Reduce to simmer and cover.

In a large high-sided skillet, heat 2T olive oil over medium high heat.  Sautee mushrooms in batches, until golden brown. Remove from heat and set aside.

Reduce heat to medium and in the same skillet, add remaining 2T olive oil. Add shallot and ginger to pan and cook until shallots become translucent, about 2-3 minutes.  Add faro to pan and toast for 1-2.  Pour wine into pan and stir continually until faro absorbs completely.  Add 1c of stock to faro at a time, stir until all liquid is absorbed before adding another cup. Once faro is cooked al dente, reduce heat to low and add lime juice and soy sauce. Stir vigorously to build the starchiness, which gives risotto its creamy texture. Finally add mushrooms, peas and cilantro to faroto. Season with salt and pepper to taste. Enjoy. 

eNJeOi-EwH2qnWv4EQGSttUJI-ONw_58OJXZcYbka9w.jpeg

Recipe Challenge!

Vote 0 Votes

WE GIVE YOU INSPIRING RECIPES--YOU SEND US YOUR FAVORITES!

Chef Justin Kouri, our new Culinary Coordinator, is kicking off a fun recipe exchange featuring his tantalizng dishes from RecipeHouse along with his picks of those submitted by our readers, followers, and fans-that's YOU! What are you doing to ban lunch box boredom and jazz up your back-to-school lunch routine? Send your yummiest recipe - it can be super simple or a four-course meal - for a packed lunch to [email protected] and you could win the August Challenge and be included in next year's VEGOUT! COOKBOOK. Veggie Panini.JPGVeggie Panini

Recipe by Chef Justin Kouri
This back to school recipe replaces sugar loaded condiments with a healthy alternative!
Don't have a Panini Grill? There's no need! We'll show you how to make your own press with the grill pan you already own and an extra brick!
 
INGREDIENTS 
 
Corn Spread                      Sandwich:
4 ears corn                        8 slices multigrain bread
2 limes, juiced                   ¼ head red cabbage, shredded
1 jalapeño, small dice        2 beefsteak tomatoes, sliced
                                          1 red onion, thinly sliced
                                   8 slices of fontina cheese
PROCEDURE
Corn Spread
Shuck corncobs and remove kernels. Place the corn and lime juice in a food processor and blitz until almost smooth, about 5 minutes. Strain and discard solid remnants. Add corn mixture to small saucepan and cook over medium heat, stirring until thick, about 15 minutes. Remove from heat and fold in jalapeño. Allow to cool completely.
 
Sandwich
Heat Panini grill or make shift grill (grill plate and foil covered brick) over medium high heat. Spread cooled corn spread on one side of both slices of bread. Arrange cabbage, tomato, onion and cheese on one slice of bread. Close sandwich with remaining slice, spread side down. Place sandwich on Panini grill and cook until cheese begins to melt. If using a make shift grill position sandwich on grill and place brick on top. Cook for 1-2 minutes, flip sandwich, placing brick back on top and cook for another 2 minutes. Remove from heat, cut in half and enjoy!

Picnic Shish Kebabs

Vote 0 Votes

July is National Picnic Month! Now is the time to enjoy the warm summer weather with friends and family united by a plateful of the season's best produce. 

Two key attributes to a perfect picnic dish: ease and portablitiy. Our Veggie Shish Kebabs & Dipping Sauce are fast to prepare and can be eaten with a frisbee in hand. Bon appétit!

Shish Kebabs and Dipping Sauce.png

Veggie Shish Kebabs & Dipping Sauce

INGREDIENTS 

Skewers:                                Dipping Sauce:                               

1t cumin                                1c greek yogurt                                  

1t coriander                           2T parsley

½t sumac                              2T mint                                                                                                                

½t fenugreek                         1t red curry paste                             

1 eggplant                             2 lemons, zested & juiced                

2 zucchini                              Salt & pepper                                     

2 summer squash 

1 pint cherry tomatoes

Salt & pepper

PROCEDURE

Preheat grill to high, or if using a grill pan, heat over high heat.

Combine yogurt, mint, parsley, curry, lemon zest and juice in a large bowl and whisk until smooth. Season with salt and pepper to taste. Set aside. 

Combine cumin, coriander, sumac and fenugreek in a large bowl. Cut the eggplant into 1" cubes. Cut zucchini and squash in half long-wise, half again long-wise and then slice into 1" pieces.  Toss vegetables with spices.  Skewer. Grill over high heat until charred, about 3 minutes per side. Serve with sauce on side.

Yields: 4 servings

Prep time: 10 min

Active cooking time: 12 minutes

Total time: 22 minutes

Original recipe and photograph created for Recipe for Success by Chef Justin Kouri. 

                     - - - - - - - - - - - - - - - - - - - - - - - - - - - - - - - - - - - - - - - - 

What is your favorite picnic spot? 

Summer Veg Paella

Vote 0 Votes

Summer Veg.jpgPaella is truly an interesting dish. It is a compilation of Roman irrigation, the rice brought by the Moors to the Iberian Peninsula and the Spanish worker. Conceived in Valencia, paella is traditionally cooked in a low, flat-bottomed skillet over an open flame. The Spanish workers would cook paella with chicken, rabbit, snails and vegetables - anything that was inexpensive. Now most Spanish regions have their own twists on this famous dish.

My veggie focused take on paella incorporates the other culinary export from Valencia - oranges. Using the zest brightens the flavor profile and the juice adds some necessary acid and sweetness to the dish. I used summer squash and eggplant in my version, but depending on seasonal availability, feel free to substitute any vegetable.

INGREDIENTS

 4c chicken stock

Pinch of saffron

5 sprigs of thyme

2T olive oil

1 small yellow squash (cut into ¼"coins)

1 small zucchini (cut into ¼" coins)

½ eggplant (cut into ¼" coins)

1 oz of dried chorizo, finely chopped (about ¼c)

½ onion, finely chopped (about ½c)

1 small red bell pepper, finely chopped (about ½c)

2T tomato paste

3 cloves garlic, minced

1T fresh thyme

1t paprika

¼t cayenne

Zest of 1 orange

Juice of 1 orange

Pinch of saffron

1c Arborio rice

1t salt

Flat leave parsley, roughly chopped, for garnish

 PROCEDURE

  1. Bring stock, saffron and sprigs of thyme to a simmer in a medium size pot. Keep at a simmer until ready to use. 
  2.  Heat oil in a large flat bottom skillet over medium high heat. Quickly sear both sides of the vegetable: 2 minutes per side for the yellow squash and zucchini; 4 minutes per side for the eggplant. Set aside.
  3. In the same skillet add chorizo, onion and pepper. Cook until the onions are translucent and starting to brown. Add tomato paste, garlic, thyme, paprika and cayenne and continue to cook for 5 minutes, stirring constantly. Add rice to skillet, continuing to stir, toasting the rice for 2 minutes. Add the orange zest, juice, saffron and chicken stock. When the liquid boils, reduce heat to low. Stir the rice mixture frequently for 5 minutes. Stop stirring and allow rice to cook for 20 minutes. DO NOT STIR. After 20 minutes, nestle the seared vegetables into the paella, cover the skillet and turn off the heat. Allow to rest for 15 minutes. Garnish with parsley and serve immediately.


Yields: 4 servings

Prep time: 15 minutes

Active cooking time: 1 hour 15 minutes

Inactive time: 15 minutes

Total time: 1 hour 45 minutes

Skill level: Easy

 Justin Kouri is Recipe for Success' Culinary Education Coordinator. He tweets at @ChefJustinR4S.

Who's ready for Eat This! Summer Camps?!

Vote 0 Votes

SummerCamp2014Cheers1.jpg

While you're counting down the days till school's out, don't forget to check out the fun-filled Summer Camps at RecipeHouse coming up in June and July. Kids spend the week learning about cooking and gardening alongside talented chefs and wonderful garden instructors.

Choose from two programs: the original Eat This! Camp combination of cooking and gardening and product development, and Eat it! Food Adventures with Marco Polo exploring cuisines from Italy, Greece, Turkey, India and China. 

 Enrollment is open to all children ages 8-11. The 5-day camps are held at RecipeHouse, conveniently located in Houston's Museum District. Find camp dates and program details and download registration forms via the Eat This! Summer Camp page. 

Snack Time

Vote 0 Votes

If you are someone who only eats at meal times, power to you. Around 3 PM on most days, I am struck with an intense snack craving akin to someone on a two hour hike. As a teacher, I know I am not alone in that feeling. The last bell of the day rings and kids are off scavenging for snacks like leopards on the hunt. Unfortunately, many students settle for highly processed, fire hydrant red powdered "cheese" puffs and other snacks with a similar dirth in substence. Parents, fear not! We have an easy and delicious alternative: Chewy No-Bake Granola Bars. 

These bars are the perfect refueling snack for children (and adults too!) who need the energy for afternoon activities like tutorials and sports, without the excessive sugar and salt. The nuts offer great protein while the wheat germ adds a nice fiber boost! Enjoy. 

Granola Bars 2.png

Chewy No-Bake Granola Bars

Recipe by Justin Kouri

 Ingredients

 1c Rolled oats

½c Pecans, roughly chopped

¼c Shredded coconut

2T Coconut oil

1/3c Honey

1T Brown sugar

1t Vanilla extract

2T Wheat germ

½t Sea salt

¼c Dried cranberries

PROCEDURE

Pre-heat oven to 350°F. Line a 9"x5" loaf pan with parchment paper so that there is an extra 2" on the long sides of the pan. This will make it easier to remove the finished product from the pan.

Place oats, pecans and coconut on baking sheet and toast for 15 minutes, stirring the ingredients every five minutes.

Meanwhile, over medium-high heat, combine coconut oil, honey, brown sugar and vanilla in small sauce pan and bring to a boil. Right when it begins to bubble, remove from heat.

 Once the oat mixture is toasted, place in large metal bowl. Add wheat germ, salt and dried cranberries to the oat mixture. Add the warm honey mixture to the bowl and stir until everything is combined.  Pour into prepared pan, and press with spatula so that the mixture is uniform. Allow to cool for 15 minutes, then wrap with plastic and chill for 45 minutes, or overnight. Pull the granola loaf out of the pan, cut into 6  uniform bars and serve.

 Yields: 6 servings

Prep time: 5 minutes

Active cooking time: 15 minutes

Inactive cooking time: 1 hour

Total time: 1 hour 20 minutes

Skill level: Easy

Let us know how you and your kiddos like them in the comments below! What would you add?  

Arctic Blast Survival Soup

Vote 0 Votes

January is the time we all swear we'll eat better, and we promise ourselves we'll cook better food for our family, but darn it's cold... and we want something comforting... and warm.

carrotsoup.jpgI adore this Moroccan-inspired carrot soup that truly hits on all fronts. It is warm, satisfying, pretty to look at, healthy... and my kids will even eat it! (Though I admit I don't tell them that it is basically cooked carrots whizzed up in a blender.)

The process is quick and simple and leaves room for innovation, if you're into that kind of thing:

Sweat half of a chopped onion in a little butter. Throw in an array of spices that will have your kitchen smelling like the Kasbah. I love turmeric, as I read recently that it's good for joints, and coriander has the most delicious smell, so I add some of that as well.  A dash of cinnamon finishes it off for me, though some curry powder would be nice, or sometimes I add a little cumin.

Let the spices toast a bit before adding about 12 coarsely chopped carrots and chicken stock to just cover them, bring to a boil, reduce to simmer, cover and 20 minutes later, you're ready for the blender and a soul-inspiring bowl of soup.

I like mine with a dollop of Greek yogurt and toasted nuts, but my kids prefer a giant crouton with melted cheese smack dab in the middle of theirs!

What recipes help YOU walk the line between honoring New Year's Resolutions and keeping warm and toasty? Tell us in the comments!


Benihana to the Rescue!

Helen Bow
Vote 0 Votes

RFS Board Member Helen Bow is passionate about healthy eating and exercise.  With one son who's an adventurous eater (Greyson) and one who's a selective eater (Miles), it is always a challenge to please everyone at the dinner table. Often, it requires a little creativity.

teppanyaki.jpgMy 13-year-old son Miles has been selective about what he consumes from the get-go.  When he was old enough to start drinking milk from a cup, he refused to do so.  The kiddo hasn't had a full serving of milk in 12 years.  I'm not kidding.  That includes ice cream.  Yes, that's right.  My son will not even eat ice cream; and yet will opt for sorbet or gelato. To make sure he's getting the nutrients that milk provides, I've learned to compensate, offering him lots of cheese or sneaking milk or cream into mashed potatoes or mac and cheese.

Oddly, Miles loves onions and will eat them raw and cut up like an apple.  I'm always at a loss on what to cook to please the kiddo, to get him to eat healthy foods.  Last weekend, I decided to capitalize on the fact that he loves onions and drew inspiration from a recent trip to Benihana, famous for its teppanyaki-style cuisine.  Miles loves the place and gobbles up the soup, chicken fried rice, shrimp and beef.  So at home, I decided to make him chicken fried rice and included onions, carrots, peas and red and green bell peppers--and he loved it!  I also boiled carrots, onions and green bell peppers, cayenne pepper with soy sauce in organic chicken broth to create my own version of the Benihana soup and he devoured it, veggies and all.

What's more, the leftovers were plentiful so we could enjoy it for a few more days.  Thank you--or arigatou--for the inspiration Benihana!

Have you ever re-created one of your children's favorite dining experiences at home? Tell us in the comments! Or try this healthy stir-fry that uses a surprising technique!

Baked Veggie Fritters

Jenna White
Vote 0 Votes

The holiday season means plenty of celebrating centered around sharing favorite food traditions with loved ones. But after the big meal's been eaten and the party fun's been had, you may find yourself drained of inspiration to create but one more inventive meal.

In a kitchen just like yours, in circumstances just like this, is how the veggie fritter was born. At least we assume so since its simple genius is perfect for such an occasion. 

BakedSweetPotatoFritters.jpg

This month Chef Jon Buchanan of Trevisio baked veggie fritters with Seed-to-Plate Nutrition Education™ students at MacGregor Elementary, inspiring him to recreate the dish in technicolor for a family meal with his staff (pictured here).

In Britain, fritters take the form of "bubble and squeak", so called due to the sounds they emit as they sizzle in a hot pan, and take advantage of what remains from Sunday supper. Roasted root vegetables, soft and sweet, are lazily mashed and combined with some egg and flour before being dropped into a pan and refashioned into beautifully irregular savory pancakes. It's exactly the end your holiday meal leftovers dreamed of. And requires the tiniest bit of effort, lucky for you.

Of course, fresh vegetables work swimmingly, as well. Whatever you have on hand, really, no matter the season, just shred, mix with back bone-providing elements, liven with herbs and aromatics, then into the pan they go.

To lighten up this version, we send forgo pan frying and instead send our "fritters" into the oven to finish the transformation from humble ingredients to humble yet satisfying comfort food. While you wait, whip up a tangy, bright sauce that will awaken the whole dish, as well as your house guests.

Baked Veggie Fritters

Ingredients

For the fritters:

1 cup zucchini
1 cup carrot
2 cup potato (russet or sweet), cooked
2 eggs
½ cup whole wheat bread crumbs 
½ cup parsley, chopped
½ cup mint, chopped
½ teaspoon cumin
½ teaspoon black pepper
½ teaspoon salt 
6 tablespoons extra-virgin olive oil

For the yogurt sauce:

1 cup plan, lowfat yogurt
2 tablespoons yellow mustard (or whichever kind you have will do)
2 tablespoons fresh herbs (such as parsley, dill, mint, cilantro or a mix)
1 tablespoon lemon juice
1 garlic clove, minced
Salt and pepper, to taste

Directions  

To make the fritters:

  • Preheat oven to 450°. Lightly oil a baking sheet and set aside.
  • Scoop cooked potato out of skin and mash with the back of a fork. 
  • Cut zucchini into small ¼-inch cubes (or grate). Add to bowl with potato.
  • Peel and grate carrots. Add to bowl with potato and zucchini.
  • Crack eggs into a separate bowl.  Whisk with a fork before adding to bowl.
  • Add chopped mint and parsley, bread crumbs, cumin, salt and pepper. Stir to combine.
  • Measure 1 heaping tablespoon of mixture, roll into a ball and place on baking sheet oiled baking sheet. Repeat until all of the mixture is used.
  • Using the bottom of a glass or cup, flatten each ball until about ½-inch thick.
  • Bake at 450° for 6 minutes, flip each fritter and bake another 6 minutes.

To make the sauce: 

  • Peel and mince garlic, chop herbs and combine with yogurt, mustard and lemon juice. Stir to combine.
  • Taste and season to taste with salt and pepper.
  • Thin with a small amount of water if needed.
  • Serve each fritter with yogurt sauce and enjoy!

Find even more ideas for healthy, delicious recipes for any occasion on our Pinterest boards.

10 Tips for Healthy Holidays

Michael Pearce
Vote 0 Votes

2014 has been a fun and crazy year.  We can hardly believe we are already heading into the holiday season. It seems like we were just putting out Easter eggs. Still, we need to face the inevitable; the holidays are upon us. Facing this realization also means dealing with the dinners, parties and gift baskets of food. Thanksgiving alone can put you in a food coma through the next holiday.

With holiday cards to write, presents to buy and parties to attend, we all need to remember to try to eat healthy during the holidays or face the sluggish effects of our bad choices. I'm not kidding. Last year, I dove into the candy dish at a holiday party and just woke up to write this post.

ElvesPie.jpgSo, to learn from my mistakes, I've compiled this list:

10 Healthy Eating Tips to Survive the Holidays

  1. Trim Back The Trimmings - Unlike a Holiday Tree, you don't need to trim out your plate with everything. A little discretion here can save you pounds of guilt later. Avoid empty calories in cookies, chocolates and processed foods. 
  2. Don't Be A Scrooge - At the same time, don't be afraid to indulge in your sweet treat, be it fruit, nuts or even a chocolate truffle, if that's your thing. Moderation is key. Food, like life, is meant to be enjoyed, especially around the holidays. Just remember that gluttony will not look pretty come summer.
  3. Be A Food Snob - It's the one time it's okay to be a snob at a party.  If you don't love it, don't try it. Only fill your plate with food you love. If you don't see anything you like, grab a glass and raise a toast to your host. You don't need to bend your elbows at the buffet.
  4. Fuel Up For The Festivities - Just like you don't go to the grocery store hungry, don't go to a holiday party that way. You'll find yourself better able to resist temptation if you aren't imagining the other guests as a crunchy treat.
  5. Be Merry, Drink Then Eat - Before you head for the food, grab a drink, circle the room and mingle. You may find you won't even end up at the food trough.
  6. Step Away From The Chocolates - If sweets are your trigger, then don't stand next to them. Out of sight, out of mind has been a winning mantra for years. If it's in front of you and you can reach it, you'll be eating it. Treat those sweets like an ex that owes you money. You don't even want to see it!
  7. Walk Don't Skip - If you over-indulge in one meal, up your daily exercise and/or lessen the next, don't skip meals. Surviving the holidays is about making healthy choices. Don't fall into unhealthy practices. 
  8. It Isn't All About The Cookies - There are lots of fun activities we can do with the family that don't involve baking cookies and pies. You can make wreaths and cards, but if you are going to make cookies, then check out some of our healthy recipes.
  9. Fill Your Home With Good Goodies - Instead of having bowls of sugary treats out on display for the family and guests, keep healthy, nutritious alternatives around. Eating several meals a day can be healthy provided the options are healthy.
  10. Enjoy What You're Eating - Nutritious food is meant to be shared, appreciated and celebrated. Savor it and enjoy the experience. Don't cram it down in between anecdotes. Treat your standing cocktail party the way you would a lovely sit down. Don't rush, stop to enjoy, savor and celebrate.

Have more tips to add to the list? Share them below!

Michael Pearce is one half of the amazing duo completed by husband Matt Burrus. They round out their happy home with daughter, Estelle, age three, and newest addition, baby Winston. Michael and Matt share more of their adventures in parenting over at the Gayby Boom blog.

The Trick-or-Treat Toy Test

Vote 0 Votes

This year health-conscious, sugar-avoiding Houston mama Becky Flechsig decided to test the trick-or-treating waters and see whether Halloween would sink or float without the focus on candy. See how it went...

mermaid.jpgI used my trick-or-treaters this year. I started to wonder what a non candy Halloween would look like and the next thing I knew I was on Amazon buying mini gliders, spider rings, glow in the dark bugs, glow stick  bracelets, and mini bubbles. And I was excited like a nerd about it.

I had a lot of apprehension about the possibility of an old fashioned egging or making small children cry, so on October 30th I went out and bought a mixed bag of mini M&Ms, Snickers and Skittles. The candy lived inside of the ghost (a decoration my grandmother made with paper mache, a balloon & a milk jug) and the toys were in an open bowl. 

halloweencandy.jpgAt the end of the night the candy was gone, but I will have no problem with the possibility of not buying it next year. EVERYONE was nuts over the glow bracelets. I didn't make them into bracelets, just kept them straight like little sticks. Kids were running around with them and when we handed them out, the reactions were fantastic.

The runner up non candy giveaway was the mini bubbles. Everything else was kind of meh. The reason the candy was gone is because after they picked a toy, I was like "and take some candy, too" because I did not want that stuff lying around the house. But next year, we'll probably skip the candy without regret.

This post was originally published on Becky's blog over at Raising Texas.

How do YOU handle the trick-or-treating debacle? Any successful ideas you've tried or seen? Share in the comments!


Homemade Granola

Jenna White
Vote 0 Votes

Granola.jpgWe welcome the cooler breezes that autumn brings, but with the reprieve from the sweltering summer heat comes the frenzy of back-to-school, holidays and an inevitably overflowing schedule. Ensuring your family stays fueled means packing a few nutritious, energizing recipes in your back pocket. This one, you'll love.

If you've never made granola at home, you'll be  surprised at how simple it is, not to mention cheaper than storebought varieties. Granola from scratch also means you control what goes in; skip the refined sugar, corn syrup and preservatives and customize flavor combos to the whims of you and your favorite snackers, who will love helping make this snack.

Granola, of course, is good on the go as a pick-me-up snack, but it's also a filling way to start the day - simply add your favorite milk or top with yogurt and fresh seasonal fruit. 

Easy-peasy Homemade Granola
Yield - 3 ½ cup (Approximately 14 ¼-cup servings)

Ingredients
2 cup rolled oats
½ cup sliced almonds
½ cup chopped pecans
½ cup raw sunflower seeds
3 tablespoon canola oil
¼ cup honey
½ teaspoon vanilla extract
1 ½ teaspoon ground cinnamon

Directions

  • Preheat oven to 350°F.
  • Line 2 quarter sheet pans or 1 half sheet pan with parchment paper.
  • Place oil, honey, vanilla, and cinnamon in a small bowl. Stir to combine.
  • Chop the pecans with a knife and place in a medium bowl.
  • Place oats, almonds, and sunflower seeds into the bowl with the pecans and mix until combined.
  • Pour the honey mixture onto granola mixture and mix with a spatula until well coated.
  • Turn out granola onto the prepared cookie sheet(s).  Spread the mixture evenly on the cookie sheet in a thin layer.
  • Cook for 10 minutes. Remove from the oven. Stir the granola. Return the pan to the oven. Cook for 10 more minutes or until golden and crunchy.
  • Remove from the oven. Let cool completely.
  • Store in an airtight container.

Have your own favorite granola flavor combinations? Share in the comments!

Fresh Chef Surpríse Season

Jenna White
Vote 0 Votes

Jonathan LevineWE'RE BAAAAAACK. RecipeHouse took a brief hiatus from our chef-led pop-up dinners this summer to make room for Eat This! Summer Camp, but this fall, we're back in action!  Helping us kick off the 2014-2015 season is talented chef Jonathan Levine of Jonathan's The Rub on Monday, September 8.  As always, following a reception, Chef will serve up a multi-course wine dinner, complete with culinary demonstrations, in our intimate dining space in the Museum District.

This year, we're offering the chance to lock in your seats for the whole season with a special early bird rate. Purchase your Fall Season Tickets at $350 per person, which secures you a seat to all four of our monthly dinners this fall: September 8, October 6, November 10 and December 1. Individual dinner tickets are $99 per person and include, reception, wine and seated dinner.

We look forward to seeing you this fall at RecipeHouse!

Chef Surprise occurs on the first Monday of every month (excluding holidays) at RecipeHouse in the Museum District and features an intimate evening with some of Houston's finest chefs, benefiting Recipe for Success Foundation. For more information and to reserve seats, click here.

Worm Composting with Kids!

Jenna White
Vote 0 Votes

Vermiculture.jpg

Recipe Gardens Coordinator Justin Myers and Seed-to-Plate Nutrition Education™ students at MacGregor Elementary built a vermiculture bin, or worm composter, to create nutritious compost to nourish the plants in their edible garden. Once the bin is built and worms are added, simply feed them food scraps to produce sustainable compost.

Watch how simple this project is, and then grab supplies and do it with your own kids for!

Trouble viewing? Watch this In Our Garden video and others on our YouTube channel.

Oh so easy Lemon-Garlic Hummus

Jenna White
Vote 0 Votes
Recently Recipe for Success volunteer and Raising Texas blogger, Becky, channeled her inner hippie for some awesome homemade granola (something we do often with students in our Seed-to-Plate Nutrition Education™ kiddos and RecipeHouse campers, to much applause). You can read all about Becky's experience and get her recipe here. But she didn't stop at granola, so we decided to share her second hippie epiphany of the day: that hummus is SUPER easy to make in your very own kitchen. (It makes a rockin' pick-me-up snack, too. But you already knew that.)
 
 
Later in the day after granola was finished, my inner hippie wasn't done. (She had a big day.) I made my own hummus, which was so easy, I was able to make a last minute decision to do it. There are tons of different versions and ways, this is what I did:
 
Lemon-Garlic Hummus
Ingredients
2 cup canned chickpeas (also called Garbanzo Beans) drained and rinsed
1/3 cup extra virgin olive oil
3 tablespoons lemon juice (I had two really juicy lemons and used them up.)
1 1/2 tablespoons tahini (found usually in the Asian food section of your store. It's sesame seed paste.)
3 cloves garlic
Directions
Put it all in a food processor (I did mine in the medium-sized Ninja Pro canister) like so:
Oh so easy lemon-garlic hummus

Then you pulse it, and this happens:


lemon-garlic hummus

BOOM! HUMMUS! And it was SO GOOD. I'm never buying hummus again. 

I have lots of Facebook friends who make their own lotion. Hummus, granola & chicken stock are just child's play. You can totally do this. Or you can still buy it all at the store. No judgement here. But this tastes so much better. Just saying. 
Peace, Love & Granola,
RT
 
Read more from Becky at RaisingTexasBlog.com.

Common Bond at RecipeHouse

Jenna White
Vote 0 Votes

Before opening their doors to the public the following week, acclaimed chef Roy Shvartzapel and the Common Bond crew hauled  dishes, tool kits and a whole mess of decadence to RecipeHouse for our May Chef Surprise. With the lofty goal of becoming "America's best bakery", Chef Roy and team gave the evening's guests a real treat - a sneak peek of their much anticipated offerings. 

CommonBond-Bread.jpgAnd while they will without a doubt have some of the best bread and pastries you've ever encountered, their savory lunch and dinner fare is nothing to scoff at. 

CommonBond-VitelloTonnato.jpgThe talented team's precision and care resulted in thoughtful, indulgent dishes that were both appealing to the eye and the palette. 

CommonBond-PistachioCake.jpgGuests were provided with parting gifts, including their soon-to-be signature kugelhopf pastry: a sweet gesture and sign that Houston's earned itself another must-taste dining spot.

Click through for a glimpse of the masterpieces crafted by the well-oiled machine that is Common Bond.

Chef Surprise occurs on the first Monday of every month at RecipeHouse in the Museum District and features an intimate evening with some of Houston's finest chefs, benefiting Recipe for Success Foundation. For more information and to reserve seats, click here.

Photos by Dragana A. Harris

Leek & Goat Cheese Frittata

Jenna White
Vote 0 Votes

Frittata.jpgThis frittata comes together in a jiffy and can be served warm, room temperature or cold. Serve with a simple arugula salad, dressed with lemon juice and olive oil. It's a great quiche substitute, as it is both carb and gluten-free. Experiment with different fillings - the sky is the limit!

Leek, Prosciutto and Goat Cheese Frittata
Serves 8

Ingredients

12 large eggs OR 6 whole eggs + 10 egg whites
¼ cup skim or 2% milk
¼ cup Parmesan cheese, shredded
Kosher salt and pepper, to taste
2 tablespoons olive oil, divided
2 leeks, white and light green parts halved, thoroughly washed of dirt and cut into thin slices
¾ cup cherry tomatoes, halved
4 ounces goat cheese, crumbled
3 ounces thinly sliced prosciutto, cut into small pieces
3 tablespoons fresh parsley, chopped

Directions 

  • Preheat oven to 350°F.
  • Add eggs, milk, Parmesan cheese and salt and pepper to a bowl, whisk until combined and set aside.
  • Heat 1 tablespoon olive oil in sauté pan over low heat and add leeks. Cook until tender.  Add to egg mixture.
  • Add ¾ of the crumbled goat cheese and chopped parsley to the egg mixture. Stir to combine.

 There are two baking options:

  • Place an oven-safe sauté pan over medium-high heat and add 1 tablespoon of olive oil.
  • Once pan is very hot, pour in the egg mixture and let cook for 2-4 min.
  • Top with the rest of your goat cheese, prosciutto, tomatoes and parsley.
  • Bake, uncovered, at 350°F for 25-30 minutes or until the frittata does not jiggle when you shake the pan.

OR

  • Pour egg and leek mixture into a greased 11-in. x 7-in. x 2-in. baking dish.
  • Sprinkle with goat cheese, prosciutto, tomatoes and parsley.
  • Bake, uncovered, at 350°F for 25-30 minutes or until the frittata does not jiggle when you shake the pan.

Cooking with Kids: Tamale Casserole

Jenna White
Vote 0 Votes
Houston mom Becky Flechsig, blogger behind Raising Texas, strives to feed her family real food and teach her two little ones that eating healthy is both important and tasty. Like us, she knows kids who get their hands dirty in the kitchen are more likely to embrace new foods. Today, she gives us some insight into how she lets daughter "L" help out.
RaisingTX-TamaleCasserole.jpgDid you know that weight patterns and food attitudes are very difficult to alter after age 11? And by "very difficult" I mean nearly impossible. It's the difference between knowing what is healthier, but still turning to the foods you grew up with. Emotional food ties. A tough nut to crack. 
One thing I am trying to do with my kids to create a healthy relationship with food is getting them in the kitchen helping as early as possible. It started with non cooking tasks like handing out the silverware from the dishwasher and just watching. That led to stirring and whisking and dumping and holding pans still. Recently L has been very eager to help more, which I love. I just have to get used to not caring about things looking too pretty. 
We are having casserole season at our house. Lots and lots of babies being born, lots of baking being done. This is one of my favorite recipes that we recently adapted to make it more organic and real food friendly. You can link to the original Chicken Tamale Casserole from Cooking Light Magazine HERE.  Below is a breakdown of the original recipe and what we did differently. Either option is easy to make with a little helper and tastes great. 
Chicken Tamale Casserole
Originally posted at Raising Texas blog
Ingredients
1 cup (4 ounces) preshredded 4-cheese Mexican blend cheese, divided (We use organic cheese)
1/3 cup fat-free milk (We use organic milk)
1/4 cup egg substitute (I don't believe in egg substitute. One egg = 1/4C)
1 teaspoon ground cumin 
1/8 teaspoon ground red pepper 
1 (14 3/4-ounce) can cream-style corn (I couldn't find organic cream style corn. Here is an easy way to make your own. One recipe = one can.)
1 (8.5-ounce) box corn muffin mix (if you want organic you can find it at whole foods)
1 (4-ounce) can chopped green chiles, drained 
Cooking spray (I rub the pan with an empty butter wrapper)
1 (10-ounce) can red enchilada sauce (there are a few organic options, but you can also make your own. This is a little more complicated at home) 
2 cups shredded cooked chicken breast (two breasts will do it and shredding is a great job for kids too!)
1/2 cup fat-free sour cream (fat free just means more chemicals and sugar. I use full fat)
Directions
  • Preheat oven to 400°.
  • Combine 1/4 cup cheese and next 7 ingredients (through chiles) in a large bowl, stirring just until moist. 
  • L was great at this. I took the ingredients out and put them into measured cups and bowls and she poured them all into the big bowl for mixing.
  • Pour mixture into a 13 x 9-inch baking dish coated with cooking spray.
  • Bake at 400° for 15 minutes or until set. Pierce entire surface liberally with a fork. L was great at this step, too. Pour enchilada sauce over top. We did this one together. 
  • Top with chicken (another great kid job!) sprinkle with remaining 3/4 cup cheese. (and she loved this step, too)  Bake at 400° for 15 minutes or until cheese melts. Remove from oven; let stand 5 minutes. Cut into 8 pieces; top each serving with 1 tablespoon sour cream.
I also think this tastes wonderful with fresh avocado. It's very easy and very delicious. When we know Landon will be eating it, we eliminate the red pepper because she sometimes will complain that the corn part is "spicy". I put spicy in quotations because she says this even when things are not spicy by definition. It means there is something extra flavorful about it. That's a good thing, right? 
 
Follow Becky's Instagram feed for daily inspiration and motivation to keep up the real food fight! And while you're at it, follows ours, too.

An Artful Meal with Uchi

Jenna White
Vote 0 Votes

Uchi-oysters.jpg

This week RecipeHouse's kitchen was taken over by one of the must talked about Houston food destinations: Uchi. True to form, the Uchi team delivered meticulously crafted and artfully presented culinary delights that exhibited the kitchen's creativity and love of what they do.

Unsurprisingly, fresh seafood played a prominent role in the evening...

Uchi-Hamachi.jpg

Hamachi, spinach, dill, garlic

... and understated veggies highlight fresh flavors of the season...  

Uchi-veggies.jpg


Asparagus, potato, mushroom, tomato

... a dessert almost too pretty to eat... 

Uchi-Dessert.jpg

Grape, curry, granola

... but the most intriguing dish was the unexpected jet black silkie chicken (a nod to Uchi's Asian influence), leg presented with foot and all, a rare treat oddly reminiscent of something you might imagine fitting for a witch's cauldron.

Click through for a glimpse of the silkie and more photos from our evening with Uchi.

Chef Surprise occurs on the first Monday of every month at RecipeHouse in the Museum District and features an intimate evening with some of Houston's finest chefs, benefiting Recipe for Success Foundation. For more information and to reserve seats, click here.

Photos by Dragana A. Harris


Sautéed Okra with Onions

Jenna White
Vote 0 Votes

Shubhra Ramineni is a culinary instructor, busy mom of a veggie-loving girl and award-winning cookbook author of Entice with Spice, Easy Indian Recipes for Busy People and Healthy Indian Vegetarian Cooking, Easy Recipes for the Hurry Home Cook. Shubhra's no-fuss cooking style recreates authentic Indian flavors using easy techniques and fresh and easily available ingredients. Below, she's shared one of her favorites for you to try at home with your family...

shubhra okra.jpgOkra, known as "lady's fingers" in India, has a beautiful bright green color and looks wonderful on the table. This simple and easy way to cook okra will leave you with a delicious dish, without any of the okra "slime!" When buying fresh okra, avoid the flimsy, flexible ones. Look for crisp ones in which the tail end can be snapped off. Avoid the very hard okra that are over-ripe with brown seeds instead of the ideal white seeds. I also never cover okra when cooking because doing so will darken its color. Okra can be eaten with Indian flatbreads, such as Naan or Chapathi, and goes well when paired with lentil dishes. - Shubhra Ramineni

Sautéed Okra with Onions (Bhindi Pyaz)
Serves 4

Prep time: 5 minutes (15 minutes if using fresh whole okra)
Cook time: 35 minutes
Refrigerator life: 3 days
Freezer life: 1 month
Reheating method: Place the refrigerated or defrosted okra in a microwave and stir periodically. Or, place them in a skillet over medium-low heat and stir periodically until warmed.

Ingredients
1 lb (500 g) fresh okra or frozen, precut okra
3 tablespoons vegetable oil
Juice of ½ lime
1 small onion,  sliced into half moons
½ teaspoon ground turmeric
½ teaspoon ground red pepper (cayenne)
1 teaspoon salt
½ teaspoon ground black pepper

Directions

  • If you're using frozen okra, do not defrost. If you're using fresh okra, wash the okra and pat dry with a kitchen towel. Trim the tip and head and discard. Slice each okra into ¼-inch (6-mm) pieces.
  • Pour the oil into a large nonstick skillet and place over medium heat. (Place over high heat if using frozen okra.) When the oil is heated, add the okra and lime juice. Sauté for 5 minutes, stirring frequently.
  • Reduce the heat to medium-low. Add the onion, turmeric, red pepper, salt, and black pepper. Stir to combine. Sauté until the okra is tender and onion becomes transparent, stirring frequently, about 30 minutes.
  • Enjoy now or let cool to room temperature and refrigerate or freeze for later!

Tip
Okra has a peculiar, slimly substance to it that is released when the okra is cut and washed. The first time I cooked okra, I washed it after I chopped it and had slime everywhere! That is why it is important to wash it and pat dry before chopping to reduce the release of the sticky material. If you're using frozen okra, it is best not to defrost it first, as it will become flimsy and release a lot of slimy substance. When okra is cooked with lime juice, any slime disappears as the okra cooks.

Recipe from Entice with Spice, Easy Indian Recipes for Busy People by Shubhra Ramineni. Learn more about Shubhra, her cookbooks and upcoming events and classes at enticewithspice.com.

Sunchoke Cha Cha Cha!

Vote 0 Votes

Bustling schedules and picky palettes can make the task of nourishing a family an uphill battle, so how do you get your brood to eat 30 different vegetables period, much less within one month?

Houston mom Amy Anton has stepped up for the challenge and is sharing her anxieties, discoveries and successes along the way.

rootveg.jpgHave you ever had a sunchoke? I hadn't even even heard of them until yesterday. And you probably don't care, but I cook A LOT. I read cooking magazines all of the time. But still, I had no idea what a sunchoke was. Until yesterday, that is.

I was wandering through the produce section at my local H-E-B, when I saw a basket marked "Sunchokes". Say what? "They are also known as Jerusalem Artichokes" Hmm, so obviously, they are some exotic version of an artichoke, I think... Not so! They are brown tubers, or root vegetables that look like a cross between ginger root and a small potato. Crazy!

I grabbed a bag of them and headed home, triumphant that I had a new vegetable for our Veggie Log. The story gets better, though, as we were having company for dinner. Perfect, I thought, they can all try sunchokes! Well, when I announced to my guests I had roasted sunchokes for them, you should have seen the look on their faces. I am sure they were thinking, she's making us try some weird food... my husband looked disgusted... and the seven boys looked at me like no way, no how. It is spring break, and I am NOT eating anything weird!

Determined, I cut the sunchokes into bite-size pieces, tossed them with olive oil and salt, and roasted them in the oven at 350 for 45 minutes. I snuck a bite of one before I served them, and WOW. Like a potato, but nutty, and not as starchy. And when I dished them out to everyone, you know what? They ALL loved them. They ate every last one! They asked for more! Boy, did I feel vindicated.

SO, if you are running out of new veggie ideas for your VegOut! Challenge (or your sanity), grab some sunchokes! They are in season right now, and I have seen them at Kroger, H-E-B, Central Market, and Whole Foods Market.